Showing posts with label scrappytailcrafts. Show all posts

Sunday, October 6, 2024

Batty Window/Scrappy Tail Crafts

Hello Friends! Today I wanted to share with you a super Spooky halloween card using the most recent release from Scrappy Tail Crafts.  The Dracula's Lair dies are so Spooky and detailed you will love them.


PROJECT DETAILS:


To create this Halloween card I started with the background, I used an A7 piece of Black cardstock as my front panel, I used Distress Foundry Wax in color Sterling to create the background.  I then cut with red cardstock the A7 Swirly Spider Web Cover Plate and adhere it to the front panel.  I then cut the bat from the Dracula's Liar set two times with black and grey cardstock.  For the center of the card I use the spooky bloody window from the same set.


I finally adhered everything to the card and added some gems and the sentiment so spooky right? Thank you so much stopping by today, I hope this inspires you to create a fun halloween project.


Tuesday, September 24, 2024

Spooky, Scary, Skeletons/Scrappy Tail Crafts

Hello Friends! Today I wanted to share with you a super fun halloween card using the most recent release from Scrappy Tail Crafts.  The Dancing Skeleton dies are so fun and cute.


PROJECT DETAILS:


To create this Halloween card I started with the background, I used Oxide ink in color Lumberjack Plaid and Black Soot.  I added water splashes as well as some sparkle silk.
For the corners of this piece I used white Ink.  I die cut the fence from the A7 Storefront Halloween Add on die I used Distress Foundry Wax in color Sterling to give the metal look I then die cut one of the skeletons from the set 3 times and for the graves I used the Frankenstein Tombstone die. 


I finally adhered everything to the card and added some bats for a more spooky lookThank you for stopping by today, I hope this inspires you to create a fun halloween project.


Saturday, August 31, 2024

Teacher Appreciation Bookmark/Scrappy Tail Crafts

Hello Friends! It is always a good day to thank those who serve and love our kids, my project today is a book mark for a teacher, you can add it to a special present or just hand it to show your appreciation.


PROJECT DETAILS:

For this project all you need is the Teacher Appreciation Bookmark die, this die comes with everything you need to create this design or many others.
I used mostly primary colors and used white for the sentiment to contrast with all the colors from the bookmark.  I added some crayons and hearts and a big red apple.  How fun is this die set you can also create cards or scrapbook layouts.


This kind of special handmade details make a special person feel more special. Thank you for stopping by today, I hope this inspires you to create some Teacher Appreciation bookmarks.


Saturday, August 24, 2024

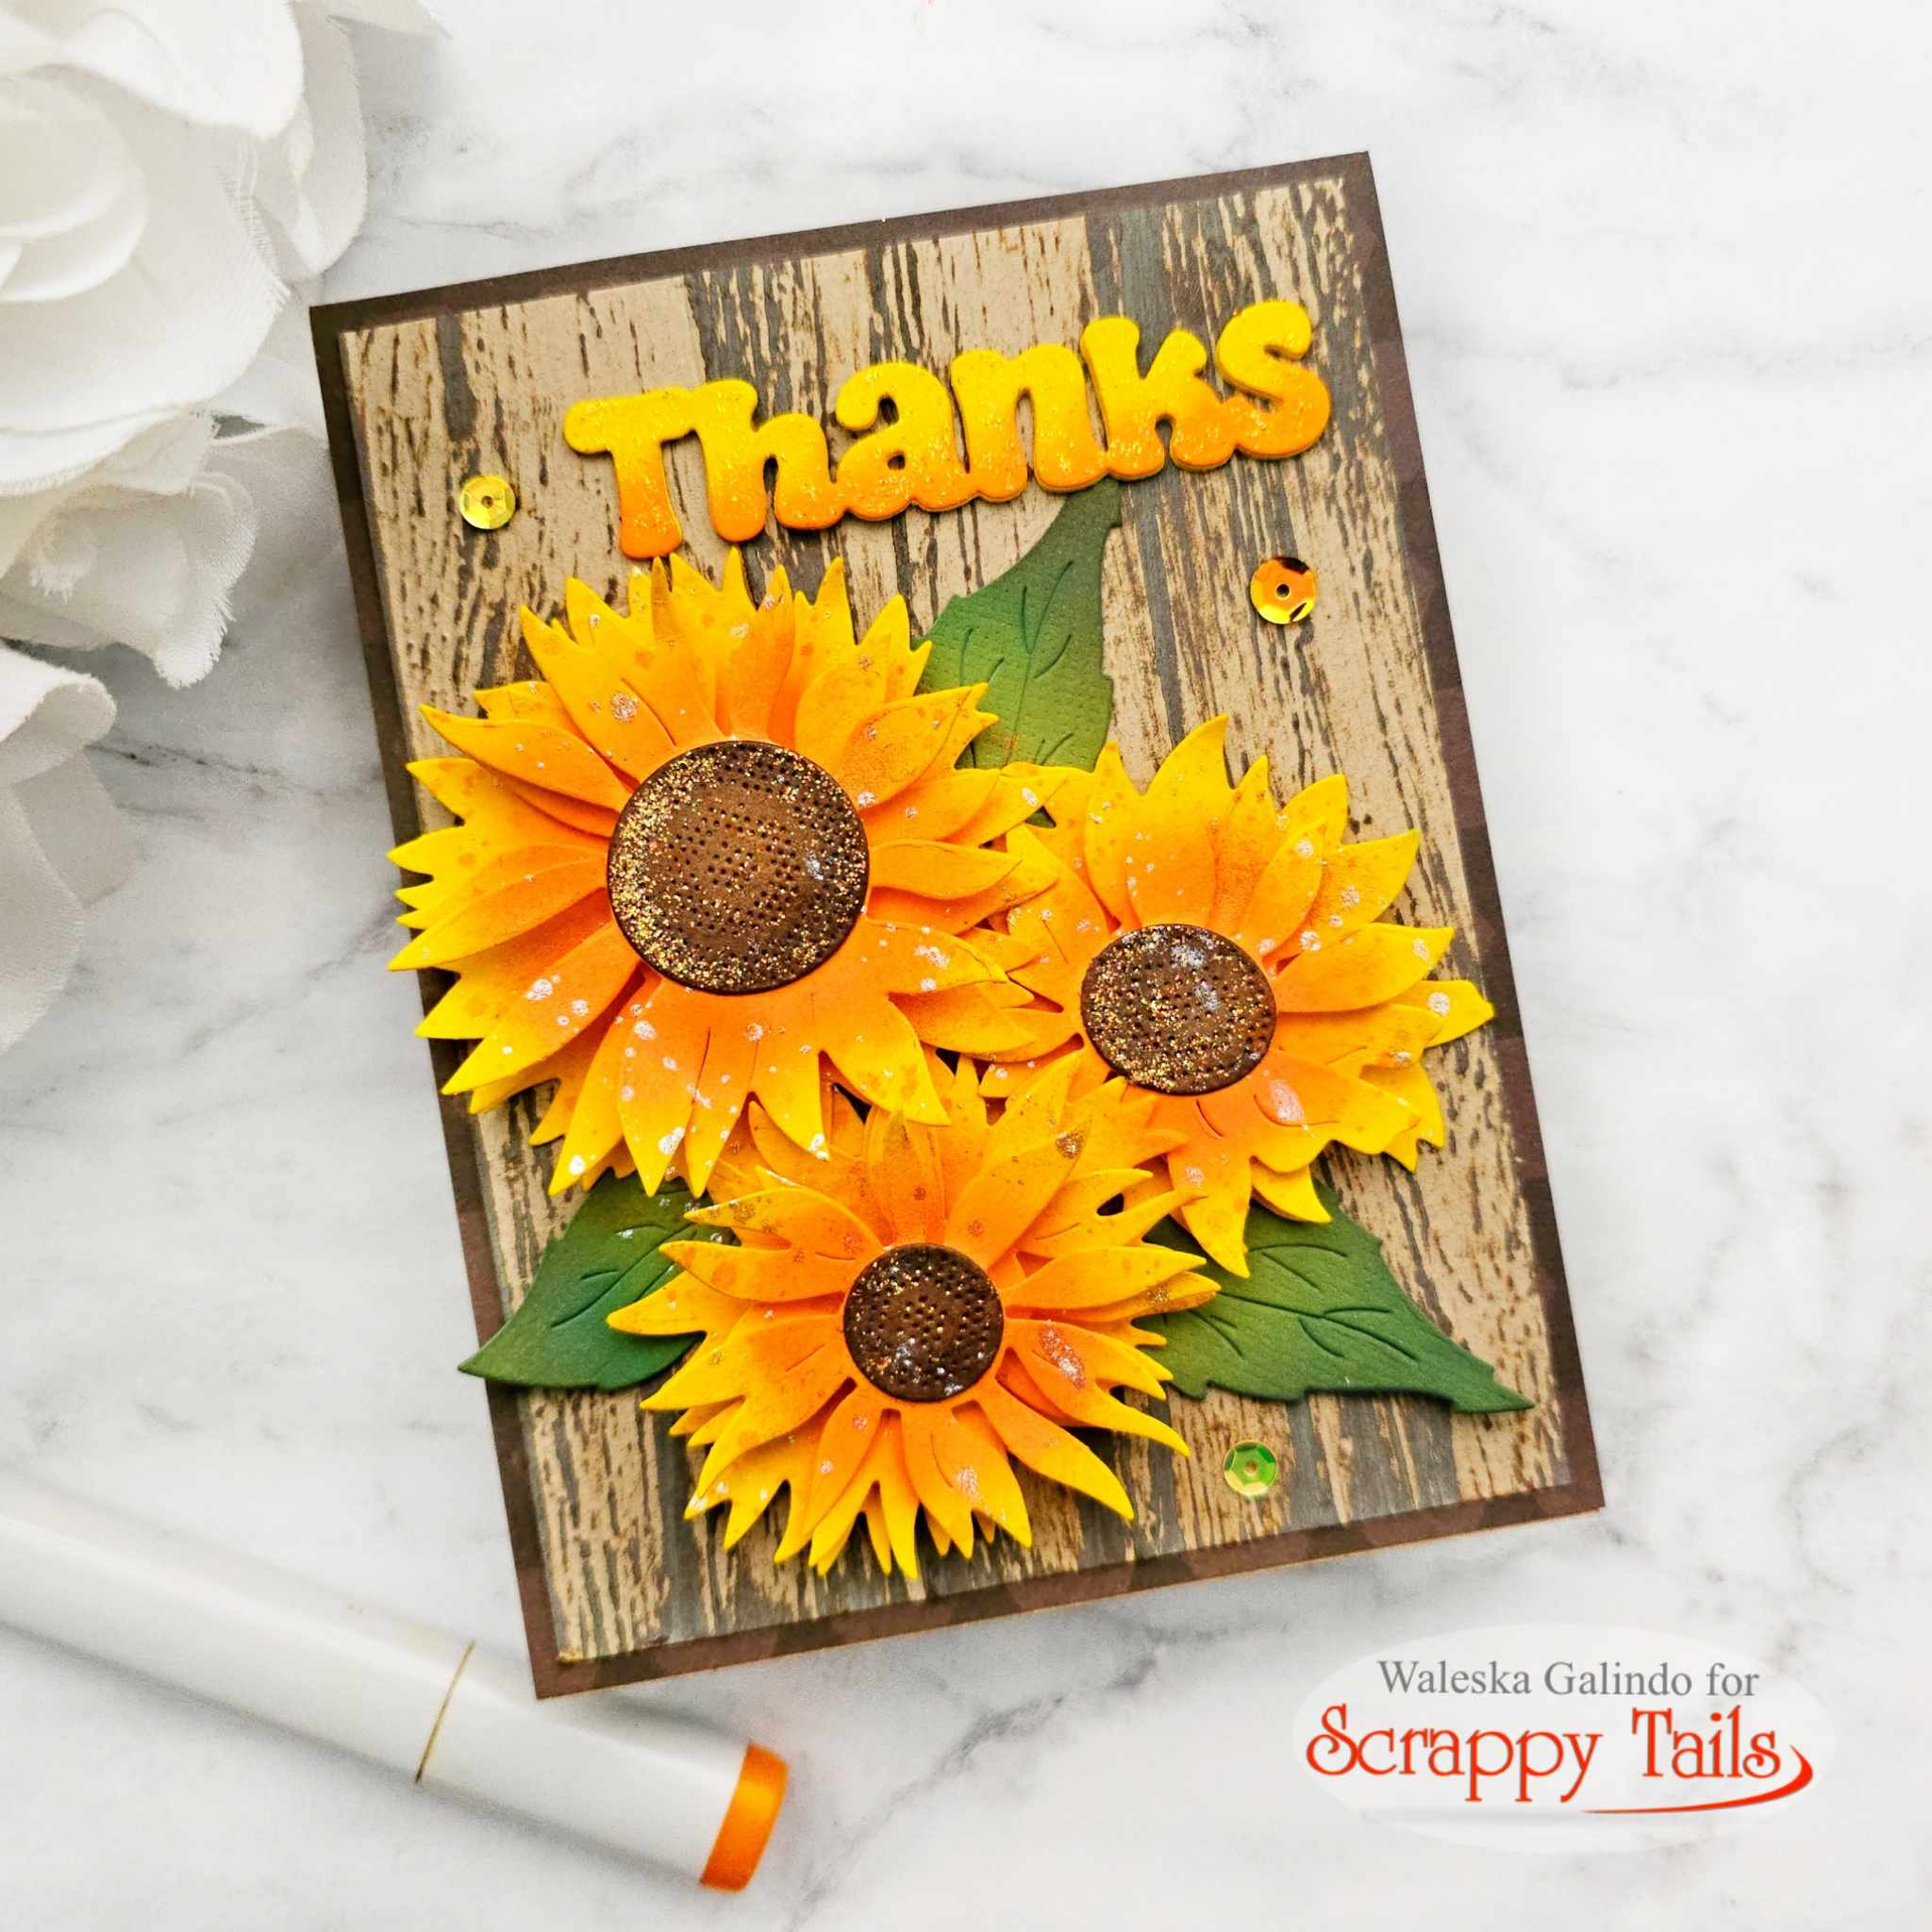
Thanks for Fall/Scrappy Tail Crafts

Hello Friends! Today I wanted to share with you some Fall inspiration with the Layering Sunflower Die. This beautiful layering die creates beautiful flowers.


PROJECT DETAILS:


To create this Fall card I started with the background, I used an embossing folder with a wood texture I inked this piece with Ground Espresso Distress Oxide ink.
I then cut the different layers of the Sun Flower with yellow cardstock, I inked this pieces with Spiced Marmalade Oxide Ink and glue them together, I then cut the center of the flower with brown cardstock and the leaves with a green cardstock.  I also cut the word thanks with the same color of cardstock I used for the flowers.


I finally assemble the flower arrangement with the three different flowers and added a brown card mat for the card.  I added the sentiment and some embellishments.
I love this coming seasons, fall is specially beautiful with the warm colors and beautiful scenes. Thank you for stopping by today, I hope this inspires you to create a fall project.


Wednesday, July 31, 2024

Road Trip Map/Scrappy Tail Crafts

Hello Friends! Today I wanted to share with you some inspiration with the new Scrappy Tail Crafts Adventure Awaits Summer Release.  For my project today I used the A7 Road Trip Map Die, I love this new release with all the travel products for your projects.


PROJECT DETAILS:


To create this A7 card I started by die cutting the map from a Scrapbook page I had, I put Oxide Ink in color Vintage Photo to the edges to create some contrast.
I then had fun with all the elements that this set has, I die cut the vintage car and the road details make a huge difference on the map, it totally looks like a road trip map.
I wanted the words Road Trip to stand out so I die cut them from red and black cardstock. 
I adhered this piece to a kraft cardstock and I created a shaped card.


I love the look of this fun vintage map, it seams so distant now that I think that we used to use maps on read trips... I would get nowhere without Google maps.  Thank you for stopping by today, I hope this inspires you to create a project with this beautiful collection.


Saturday, June 29, 2024

Bird of Paradise Aloha Book/Scrappy Tail Crafts

Hello Friends! Today I wanted to share with you more inspiration for some fun Summer Projects using the A7 Book Pop Up Die.  For my project today I wanted to use some beautiful Exotic flowers, I decided on the Layering Bird of Paradise, I love the bright colors of this flowers!

PROJECT DETAILS:

To create this Pop Up Book I started by cutting all the pieces to assemble the book I used a dark blue cardstock for the book cover and I used the A7 Aloha Tropical Leaf Cover Plate  to create a frame, I used Oxide Inks in colors Lucky Clover and Twisted Citron for this frame.  I then cut  all the pieces from the Birds of Paradise dies in white cardstock and I colored the different parts of the flowers with copic markers.  For the inside part of the book I used a cloud stencil to create a cloudy sky I glue all the elements to inside of the the book  frame and for the top of the book I cut the word Aloha that comes with the frame set.  For the other side of the cover I used a white panel and stamped a sentiment.


I love the look of Pop Up Books they would be amazing not only as a gift but also to display on a house for the Season.  Thank you for stopping by today, I hope this inspires you to create a project with this beautiful collection.


Saturday, June 15, 2024

Summer Birds Pop Up Book/Scrappy Tail Crafts

Hello Friends! Today I wanted to share with you inspiration for some fun Summer Projects using the A7 Book Pop Up Die.  The Layering Pelicans Dies are some of favorite dies from all time and I mixed them with the Layering Seagulls they look amazing!


PROJECT DETAILS:

To create this Pop Up Book I started by cutting all the pieces to assemble the book I used a colored cardstock for the book cover and I used kraft cardstock to create a frame for the beach scene.  I then cut  all the pieces from the Pelicans and Seagulls in white cardstock and I colored the different parts with copic markers.  For the inside part of the book I used a cloud stencil to create a cloudy sky I glue all the elements either to the frame of the book or inside the book and for the other side of the cover I created another frame and stamped a lighthouse from the Guiding Light Stamp set.


I love the look of this Pop Up Book Covers they would be amazing not only as a gift buy also to display on a house for the Season.
Thank you for stopping by today, I hope this inspires you to create a project with this beautiful collection.


Saturday, May 25, 2024

2024 Graduation/ Scrappy Tail Crafts

Hello Friends! I hope you are having a great day!  For my project today I decided to create a book mark for a graduate! This amazing die is from the latest release  Life is a Story.


CARD DETAILS:

This Bookmarks are so incredibly easy to make, you can make them as shakers or put a gift card either in the front or in the back you can add any colors on the details, the possibilities are endless I love them.  I decided on a classical look with black, blue and silver.  Sabrina has many 
videos for inspiration and the assemble of this dies are super easy!  They are also great for mass production!  Thank you for stopping by today, I hope this inspires you to create some fun bookmarks!


Saturday, May 11, 2024

Stacked Book with Flowers/Scrappy Tail Crafts

Hello Friends! Today I wanted to share with you some inspiration for all the Book Lovers out there with the new Stacked Book with Flowers from the latest release Life is a Story.


CARD DETAILS:

To create this card I started by die cutting the Stacked Book with Flowers with white cardstock and then with different tones of blue I cut and glue all the different books.   For the flowers I used Oxide Ink Saltwater Taffy and a green copic marker for the leaves.  I added a spectrum noir gold marker to add some of the details on the books.  I finally used the same oxide ink from the flowers to create a background and splattered this piece with water.


I finally put some gems around the card and in the center of the flowers.  Such a beautiful color combo and great for a book lover!
Thank you for stopping by today, I hope this inspires you to create a project with this beautiful collection.


Saturday, March 23, 2024

Pink Tulips on a Fence/Scrappy Tail Crafts

Hello Friends! Today I wanted to share with you some inspiration for a Spring card with the new Tulip and Daffodil Layered Stencil Set from the latest release this stencil is super easy and beautiful.


CARD DETAILS:

To create this card I started by die cutting a white fence from the A7 Fence and Trellis Pop Up Die I measure the card base and cut it to size.  I then started with the stenciled part for the beautiful tulips.  I used Oxide Inks for them in colors Kirsch Flamingo, Picked Raspberry, Twisted Citron and Lucky Clover by combining a dark and more soft tone of ink you can achieve lots of layers and beautiful tones, I hand cut the tulips and cut the grass from the same fence set and used the same tones of green I previously used.


I used Kirsch Flamingo of the front panel just to have some color behind the composition.  Finally I started assembling my card by adding foam tape behind the fence and tulips for some dimension and arrange the flowers on the right corner so my sentiment will look balanced on the other side.

Thank you for stopping by today, I hope this inspires you to create some Spring cards!


Sunday, February 25, 2024

Hoppy Easter Card/Scrappy Tail Crafts

Hello Friends! I am back with more Easter inspiration for you! Today I created a card using the new Easter Egg 4 Layer stencil and the Easter Lamb Add on, I love this soft colors and sparkle together.


PROJECT DETAILS:

To start this adorable card I cut a 5 x 7 piece of kraft cardstock and started layering the Eastern Egg Stencils.  For the first two layers I used white pigment ink and for the other two I used Glitter paste, I left this piece to dry and started assembling the cute lamb.  I cut a white circle and add all the elements to create the Lamb, I ink the edges of the lamb with Kitsch Flamingo Oxide Ink.


I finally added the sentiment from the Carrot Patch Bunnies stamp and adhere the main card to a white card base I hope this inspires you to create some Easter Projects!! Have a wonderful day!


Sunday, February 18, 2024

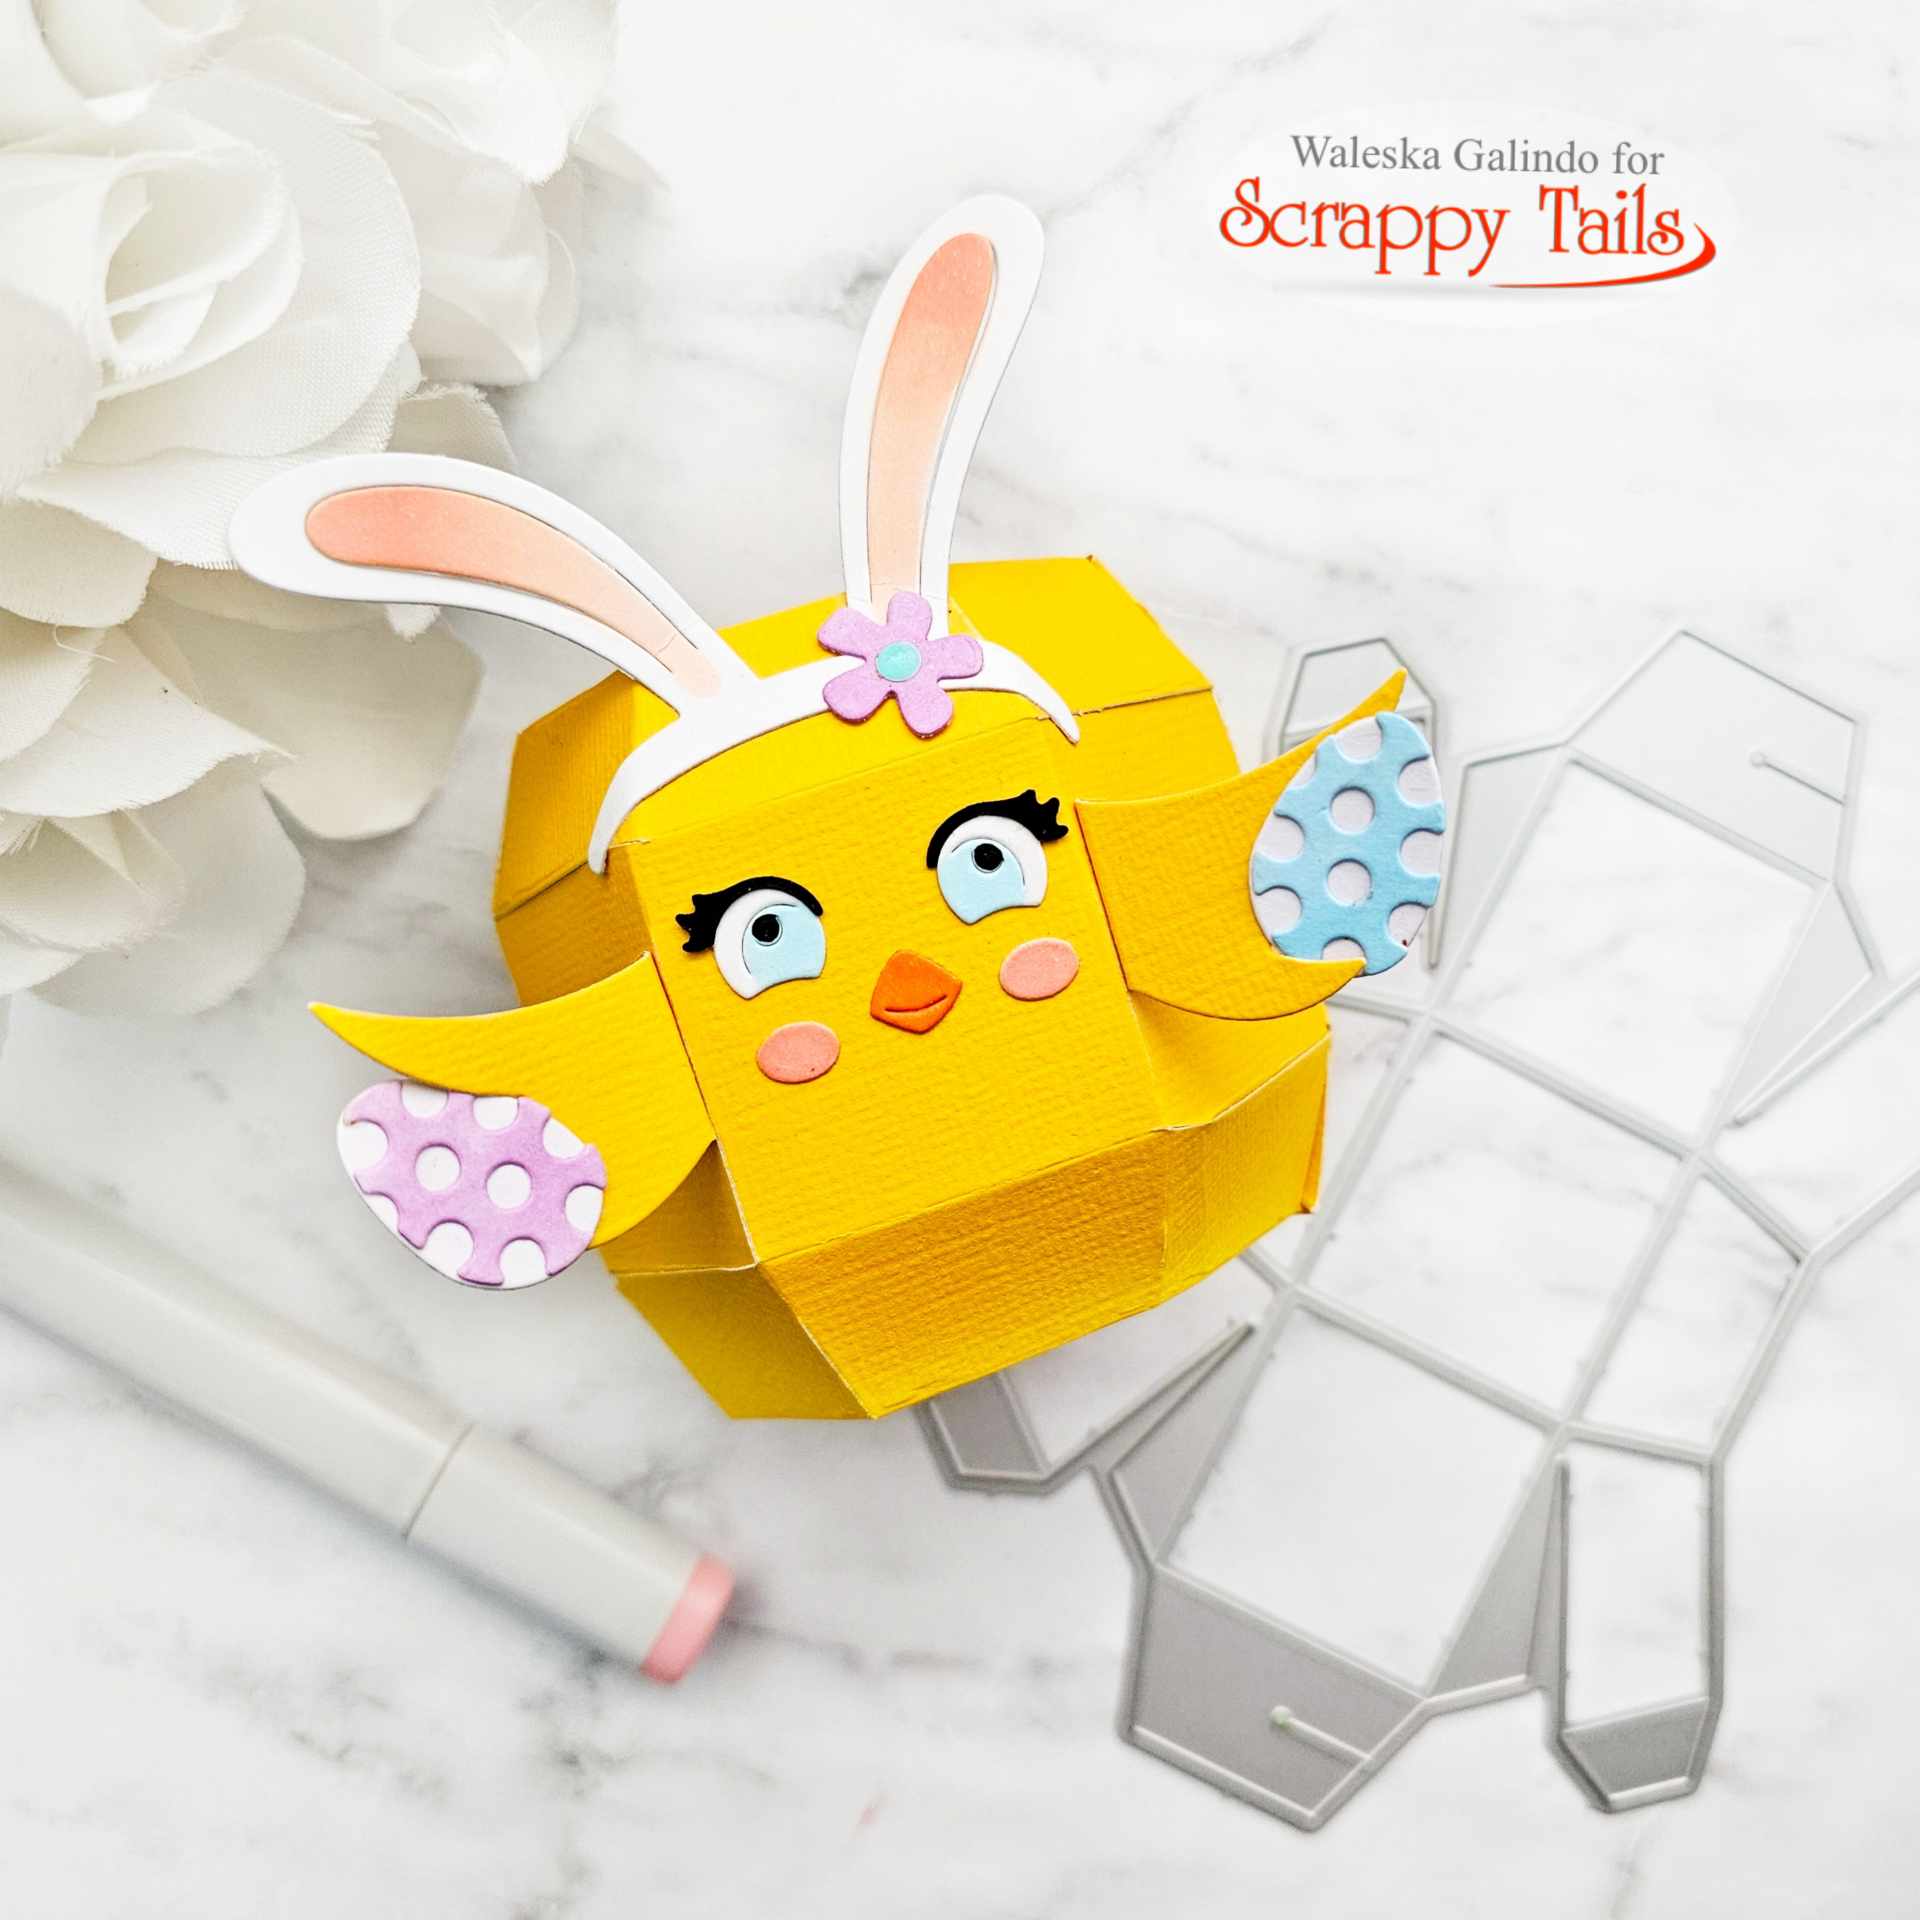
Easter Chick Box/Scrappy Tail Crafts

Hello Friends! I am happy to be back to share inspiration using the new Easter Blessings Collection, this project is super adorable and colorful...  There is something for everyone! Check it out at the Scrappy Tails Shop.


PROJECT DETAILS:

To start this cute box I die cut the Easter Chicks Add On for the Pumpkin Pop Up Card Die
with yellow cardstock, I also used different colors of markers to color the different elements of the face. In my opinion is so much easier to cut everything from white cardstock and then color it.  This Pumpkin Pop Up die is so much fun and there are so many add-ons you will love it. If you want to know how to assemble this die check out the Scrappy Tail Youtube Channel.


Are you creating Easter projects? The new Easter Bunny, Easter Lamb, Leprechaun and Lucky Gold Pot  add ons are great!  I hope this inspires you to create some Easter Projects!! Have a wonderful day!


Saturday, November 25, 2023

I'll be home for Christmas/Scrappy Tail Crafts

Hello Friends! I happy to be back to share more Christmas inspiration for you! This Christmas card is very colorful and I was inspired by one of my favorite Christmas song "I'll be home for Christmas"... The recently released Christmas Collection is amazing! There is something for everyone! Check it out at the Scrappy Tails Shop.

PROJECT DETAILS:

To start this card I die cut the Round Swirl Snowflake Ornament Craft Die with red and silver cardstock I added some shading with Oxide inks Lumberjack Plaid and Vintage Photo.  I then cut the Layering Christmas Bug Craft Die with a light blue cardstock and used Salty Ocean Oxide ink to shade it.  For the Christmas tree I used Rustic Wilderness Oxide for the shading.


I then cut some mat layering pieces from red and green cardstock in the same shade I used before and added the same oxide inks to create more dimension, I finally used some splashes of  sparkle watercolor to create the snowlike feel.  Such a fun scene!  I hope this inspires you to create some Christmas cards!  Have a wonderful day!


Saturday, November 11, 2023

Cute Christmas Penguin Friends/Scrappy Tail Crafts

Hello Friends! I hope your day is going great! Today I wanted to share a very colorful Christmas card... What is more adorable than two cute penguins?  This recently released Christmas Collection is amazing! There is something for everyone! Check it out at the Scrappy Tails Shop.


PROJECT DETAILS:

To start this card I die cut two penguins from the Layering Penguin Duo Craft Dies this are super easy to assemble and so so cute! I used black, white, orange and blue cardstock for the big pieces and for the small pieces I used white cardstock and colored it with copic markers.  I then cut a piece of 5 x 7 white cardstock to create the scene.  I used Oxide inks in colors Tumbled Glass and Kitsch Flamingo, I used some splashes of water and sparkle watercolors too.


I then cut the A7 Festive Garland Cover Plate from green cardstock and adhere it to the scene I already made for this two cute friends! I finally adhered the penguins and used white acrilic paint mixed with water to create the snow on the card.  I added the sentiment from the Christmas Icon Stamp Set and some snowflakes to enhance the scene!  Such a fun scene!  I hope this inspires you to create some Christmas cards!  Have a wonderful day!


Sunday, October 8, 2023

Spooky House/Scrappy Tail Crafts

Hello Friends! My favorite month is already here! Today I wanted to share a fun spooky project!  For this Halloween slimline card I used some old and new products.  Check out the new Halloween products at the Scrappy Tails Shop.


PROJECT DETAILS:

To start this slimline card I die cut the Slimline Pop Up House and I inked it with Oxide Inks in colors Fired Brick and Aged Mahogany I then cut the Slimline Brick Background die with kraft cardstock and inked it with Vintage Photo and Ground Espresso I used the same colors to inked the top of the house and the door.  I then cut the Halloween Spooky Window Lantern Panel dies and cut them to fit in the the house, I colored the images and used Vintage Photo Oxide Ink.


Finally cut the cute ghosts from the Friendly Mini Ghosts dies and adhered them all over the haunted house I also used some elements from the A7 Storefront Halloween House.  I love all the details from this Slimline card! So much Spookiness fun!
I hope this inspires you to create some spooky cute Halloween cards! Have an amazing day!


Sunday, September 24, 2023

Spooky Cute Jack O' Lantern Shaker card

Hello Friends! I hope your day is going great! Today I wanted to share a very colorful Halloween card... Who says Halloween is for dark tones? This recently released Halloween Collection is amazing! There is something for everyone! Check it out at the Scrappy Tails Shop.


PROJECT DETAILS:

To start this card I used the Wonky Spiderweb Stencil with Oxide inks in colors Carved Pumpkin, Picked Raspberry and Mustard Seed, I tried to blend this tree colors very well.  I then cut the Jack O' Lantern Pumpkin Metal Die with orange cardstock.  I then cut all the pieces to create a shaker piece in the center of his mouth, there are two options for the mouth I decided to use the Trick or Treat with white cardstock.  I also cut the top pieces and color them in brown and green.
I love all the details on this pumpkin... so spooky!


Such a fun die!  I hope this inspires you to create some spooky cute Halloween cards with the new Halloween Collection.


Sunday, August 27, 2023

Spooky Cute Party Favors/ Scrappy Tail Crafts

Hello Friends! I hope your great! Today I wanted to share the cutest Halloween favors for your halloween parties this year, this are made with the newest released Halloween Collection! I loove this collection there is something for everyone.


PROJECT DETAILS:

These are very easy to assemble and all you need is cardstock and glue.  I started with the Vampire Add On, to create him I used a light blue, purple and black cardstock for the base of this party favors I used the new Pumpkin Pop Up die, for this base I personally recommend a heavy cardstock since you will be putting candy on them.  I cut all the pieces to create him and adhere them at the front of the piece, to finish these I used the handle from the Purse Pop Up die.


For my second party favor I choose the Frankenstein Add On I did exactly the same as the other one but this time I used Green and Black cardstock, Sabrina has some amazing Videos on the Scrappy Tail Youtube Channel if you want some detailed instructions on how to assemble this.  Thank you so much for stopping by today! I hope this inspires you to create some spooky cute Halloween Party Favors with the new Halloween Collection.