Showing posts with label tulips. Show all posts

Saturday, March 23, 2024

Pink Tulips on a Fence/Scrappy Tail Crafts

Hello Friends! Today I wanted to share with you some inspiration for a Spring card with the new Tulip and Daffodil Layered Stencil Set from the latest release this stencil is super easy and beautiful.


CARD DETAILS:

To create this card I started by die cutting a white fence from the A7 Fence and Trellis Pop Up Die I measure the card base and cut it to size.  I then started with the stenciled part for the beautiful tulips.  I used Oxide Inks for them in colors Kirsch Flamingo, Picked Raspberry, Twisted Citron and Lucky Clover by combining a dark and more soft tone of ink you can achieve lots of layers and beautiful tones, I hand cut the tulips and cut the grass from the same fence set and used the same tones of green I previously used.


I used Kirsch Flamingo of the front panel just to have some color behind the composition.  Finally I started assembling my card by adding foam tape behind the fence and tulips for some dimension and arrange the flowers on the right corner so my sentiment will look balanced on the other side.

Thank you for stopping by today, I hope this inspires you to create some Spring cards!


Thursday, March 2, 2023

Tranquil Tulips Sunny Studio Stamps

 Hello there friends!  My card today features the beautiful Tranquil Tulips Stamps from the most recent release mixed with the Moroccan Circles Embossing folder and the Mini Mat and Tag Dies #3.

CARD DETAILS:  

For this card I wanted the Tulips to be the focal point in my card, to do that I decided to leave the tulips very colorful and the background white so they can really stand out.  I started by stamping the different layers of the tulips with the following inks: Hero Arts Ombre Pink Ink, Lawn Fawn Plastic Flamingo Ink and Lawn Fawn Lobster Ink, for the leaves I used Lawn Fawn Jalapeno Ink and Lawn Fawn Noble Fir Ink.  I hand cut the tulips and arrange them in the way I wanted.

I then embossed a white panel with the Moroccan Circles Embossing folder and cut 4 of the scalloped rectangle from the Mini Mat and Tag Dies #3, I wanted to have dimension to this piese so I adhere them together.  Finally I assemble my card by using the pattern paper as a base layer from the Dots and Stripes Jewel Tones, then the embossed panel and finally the small scalloped rectangle, my sentiment is from the Big Bold Greetings.

Thank you so much for stopping by today I hope you will be inspired to create today by my post!

Wednesday, March 1, 2023

Purple Elegance/Crafty Meraki

Hello there friends!  My card today features the beautiful Elegance Stamp set and Stencil I wanted to create something very vibrant with this set I hope you like it.


CARD DETAILS:  

For this card I wanted the beautiful flowers to be the focal point in my card, to do that I decided to use a very powerful color for them and leave the background black for contrast so they can really stand out.  I started by inking all the different layers with the stencils and oxide inks in colors  Shaded Lilac, Wilted Violet and Villanous Potion for the leaves I used Twisted Citron and Lucky Clover.  I hand cut the flowers and adhere it to a black panel I then used a white card base and finally added the sentiment with white embossing powder.  I added some shine in the center of the flower with Spectrum Noir Metallic Flip marker Nebula and some Crafty Meraki Gems called Blue Illusion.


Thank you so much for stopping by today I hope you will be inspired to create today by my post!


Saturday, April 17, 2021

Monochromatic Tulips Scrappy Tail Crafts

 Hello Friends Waleska Galindo with you again to share a new card using the Outlined Tulip Assortment Dies, I already shared a card with this beautiful die some weeks ago, but I decided to share with you more ideas on how to create beautiful and easy cards with it.  I hope you like my card today and can be inspired by it.


CARD DETAILS:

To create this card I started by choosing the color combination, I was very inspired by this red cardstock I had, I then went to my Oxide Ink color swatch and look for some colors that can go well with it,  I decided to use Festive Berries and Tattered Rose.  I ink blend a white card base starting from the darkest color and blending the light color to make a good blend.  I splash some water to this panel and set is aside to dry.


I then cut one of the tulips multiple times with the red cardstock and also some stems and leaves.  I ink blend another panel with the same colors and cut the tulips to use the inside parts with the red tulips that already cut before, I glue them together. I arrange three tulips in the left corner of my card front and adhere them together with 3D foam tape.  I added the sentiment and some beautiful embellishments and as simple as that you have your beautiful and easy Monochromatic card.


I hope you have an amazing weekend, and have some time to create! This and many other great products are available on the shop now.


Waleska


Monday, January 11, 2021

Outlined Tulip Layered dies from Scrapppy Tails Crafts

 Hello Friends, Waleska here excited to be sharing some time with you!  Also excited to be creating with the newest release for my card today I used the beautiful Outlined Tulip Assortment Two Layered Dies, I hope you like it!


CARD DETAILS:

I started by die cutting the tulips and the stems in two different shades of pink and green cardstock, in dark and  light tones, after that I used Oxide Inks in colors Picked Raspberry to shade the pink tulips in the bottom part and Rustic Wilderness for the stems.


I then worked on the card base, for the card base I die cut a circle as the focal point and I used Oxide ink Peacoack Feathers to shade the up part of it.  For the card base I used the same color but shade it at the bottom, I did some water splashes with a fine brush and let it dry.


I finally adhered the circle die cut to the center of the card base and start assemble the tulips.  I adhere the tulips with 3D Foam squares.  I stamp the sentiment from the Popping Poppies Stamp set to a black strip of cardstock.  I finally splatter some gold watercolor and added some gold sequins.


Thank you so much for joining me today! I hope you have a wonderful weekend! Remember to check out the newest release from Scrappy Tail Crafts at the shop!


Waleska

Saturday, August 18, 2018

Two Tone Magical Pegasus!

Hello Friends, today I have for you my second card as a guest designer for one Awesome new company called heartcraftpaper of one of my good crafty friends Monica, she is super talented and has many great digis at her shop...You can find digital stamps, digital sentiments, digital cutting files and digital paper....the new Pegasus release HERE.


CARD DETAILS:

To create this card I wanted a two tone look so I decided to use only two colors for the background and to color the digital stamps.  I started with the background I used Peachy Keen and Merman inks from Lawn fawn, I splash some water and dry it and after that I also added some gold watercolor splashes.


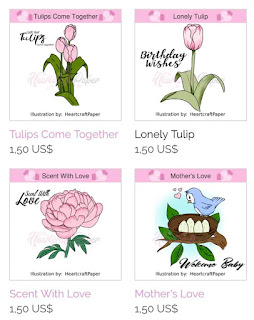
I cut a hill and adhere it to the front panel with 3D Foam.  I used two digis from Heartcraft Paper:  The Pegasus at Rest and The Lonely Tulip.  I resize the flowers with the silhouette cameo program to perfectly fit behind the hill.  I colored the pegasus and flowers with the same markers and adhere them to the card.


To finish this two toned card I put sequins in the same colors around the magical scene and stamped the sentiment with Versafine ink.


I hope you like another magical card with this magical collection of pegasus and you can check out this new amazing company!   Have an amazing Saturday!!!


 Heartcraft Paper Supplies: