Showing posts with label distressinkbackground. Show all posts

Thursday, July 15, 2021

You are a Killer Slimline card/ Whimsy Stamps Guest Designer

 Hello Friends!!! Waleska Galindo here from craftinglovew super happy to share with you my second post as this month's Guest Designer for Whimsy Stamps.  I am crazy for the new Lookin' Shark stamp set, I have a crazy love for shark stamps and this one is definetely one of my favorites so far.  I mixed this funny stamp set with the Slimline Connected Bubbles die set to create an underwater card.


CARD DETAILS:

To create this card I started with the background.  For the background I used Oxide inks in colors Peacock Feathers in the middle of the panel then I used Salty Ocean and on the edges I used Lucky Clover I blended this tree colors very well and added some water splashes for more texture and to create the under water feel to this panel.


I set this panel aside to dry and I die cut six of the Slimline Connected Bubbles die and adhere them together so they can have dimention.  I then put glue around the bubbles and add sparkling glitter to them, they look super fun with the dimention and glitter.  


I colored the super adorable and fun Sharks with Tri-blend Spectrum Noir markers in colors Ice Grey Blend, Dark Red Blend and Jade Green Blend I cut them and adhere them to the back of the biggest bubbles so they will look like they are inside the bubbles.  I stamped the sentiment with black ink and glue this panel to a white card base.


I had so much fun creating this card, I want to thank Whimsy Stamps for the amazing opportunity to design with ther awesome products I love it!!! I hope you can be inspired to create some fun summer cards with Whimsy Stamps products and remember to stay safe and stay crafty! hugs!!!


Saturday, August 4, 2018

Beautiful Pegasus/New Heartcraft Paper Company

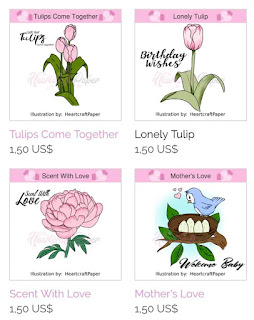
Hello Friends, today I  am a guest designer and wanted to share a card I created for one Awesome new company called heartcraftpaper of one of my good crafty friends Monica, she is super talented and has many great digis at her shop...You can find digital stamps, digital sentiments, digital cutting files and digital paper.... check her new Pegasus release HERE.


CARD DETAILS:

Ok so I loooove her new Pegasus Release, but this one is definetely my favorite, it is called Pegasus Prance.  To create this magical card I started coloring the pegasus with markers, I print many of this so I can have them ready for more cards (that is what I love about digis) I then with an embossing marker I put embossing ink on its hair and tail and added glitter embossing powder for a glittery look!!!


To create the background I used many different Oxide Ink colors, I started in the center with Peacoack Feathers and work my way out with Shaded Lilac, Seedless Preserves and the new Spun Sugar (how could I live without this color before).  I then added some water drops and with a white pigment ink and some circle stamps I created a bokeh feel to the background.


To finish the card I cut and adhere the pegasus to the background and added some small star sequins and glue this panel to a white card base.

I hope you like this magical card with this magical pegasus and you can check out this new amazing company!   Have an amazing Saturday!!!


 Heartcraft Paper Supplies:


Other things you can find at the Shop:


Thursday, May 24, 2018

Cactus Coffee Lovers Hop


Hello Friends, today I am participating on the "Coffee Lovers Hop" with this really cute Cactus Card "Yeehaw" I don't drink coffee at all but Craftin Desert Divas Digital Stamps are too amazing to pass.. have you check them out? In the Shop you can find all kinds of Digis for many occasions and the price is unbeatable!!! Let me share with you how I did it this card:


CARD DETAILS:

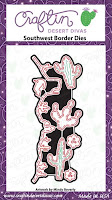
I started with the background ink blending two oxide inks,starting with Squeezed Lemonade then Worn lipstick, after this two mixed very well together I add some water splashes and I mixed the mention colors before with water and did more splashes!!  I love this look, to break those two colors I also added Lucky Clover splashes. I die cut with kraft cardstock the southwest border and colored the little cactus in the back with the same green I used for the big mugs in the front.  I love working with Digital Stamps, What to know why? Well they can be resized, you can print as many as you want and have them ready to color, you can make scenes with them, or make really simple cards and you can also save some money with them!  If you haven't used them I encourage you to try them Craftin Desert Divas has an amazing selection of this Digis you can find them HERE.


Have a wonderful day!


CDD SUPPLIES:


Wednesday, May 16, 2018

Oxide Inks Northern Lights

Hello Friends Waleska here, today I wanted to share a scene card I created specially for one of the seals on the Reverse Confetti Sealiously set, my idea was to create a northern lights night sky for a "Missing You" card for someone special.... let me share with how I got the look.


CARD DETAILS:

I started with a white card base, and googled some northern lights inspiration to know what colors I wanted to use.   I decided to use Oxide Inks in colors:  Cracked Pistachio, Wilted VioletSeedless Preserves,Worn Lipstick and Black Soot.   I started this background by applying the Oxide Ink colors randomly on the front panel, trying to blend some of them with the Ink Blending tool,  then I apply the Black Soot on the corners towards the center of the area I wanted my sky to be.  I also create some little water splashes for a dynamic look.


I set aside the sky and started working on the Icebergs, I  die cut five of the My Favorite things Icebergs Die-namics  and I apply Mermaid Lagoon Oxide ink to the bottom of each Iceberg to unify them with the iced water the cute seal will be on.


I cut a panel for the iced water and colored it with Mermaid Lagoon Oxide ink, and again splash some water on it.  I adhere the icebergs and water to the sky front panel, and glue the adorable seal I colored with copic markers.  I used one of the sentiments on the set and finally put some white dots to the sky as stars.


I hope you like my card today, and can give this Northern Lights sky idea a try....

You can find this and other awesome new products at the Drive by Crafts shop, and if you want to save some money don´t forget to use the code:


Have a great day!!!


Monday, February 5, 2018

I Love you S´more

Hello Friends Waleska here sharing with you my participation in the Lawn Fanatics Challenge Inky Fingers!! Who else is super excited for the new Lawn Fawn Release coming this February 22nd?  I am so excited and as always wanting to buy the entire Release!!! I definitely need to start finding a job if I want to keep buying stamps, dies and crafty supplies, thanks God I don´t live in the States because I will probably leave my husband without money!!! hahaha.  For this challenge I got really inky and I created a heavy distress ink background for a very cute couple that I include in my Cute Couples Card Series for this coming Valentine Day!! I am sharing a cute couple card each day on my Instagram until february 14 Celebrating Love and Cute stamps!!! Now here is my card for the Challenge:


CARD DETAILS:

For this cute card I used the new Sweet Friends Stamp Set from Lawn Fawn.  For my card base I used the Gina Marie Designs Starry Sky Background Plate Die which is amazing to create night scene cards, totally recommend to check her products... They are amazing and the prizes too. I ink blend the whole piece with Faded Jeans Oxide Ink and Black Soot only on the edges, to create the fire I used Fossilized Amber and Spiced Marmalade and I applied it in a circular motion to give the feel of fire.  To create the branches for the smores I used the Leafy Tree Backdrop, and cut a little branch from it.  For the stars background I used the same colors from the fire to unify the design, I color the cute couple and added glossy accents to the marshmallow part of them.  Finally added some sequins, a heart and the fun sentiment.

Thanks for visiting my blog and I invite you to join me on instagram for more cute couples cards!! I share one card daily... I love getting to know more crafty friends through there here:  


Here are some cards you can find on my series


Have a great starting week and enjoy this love month!!


Monday, October 9, 2017

Trick or Treat Newton's Nook Guest Designer

Hello Friends, Waleska here from craftinglovew with another halloween card. (I told you I am a HUGE Halloween fan) I used our friend Newton in different costumes for a fun Trick or Treat scene.


CARD DETAILS:

For the background  of my card today I used oxide inks, and because they blend so well you can almost mix any colors beautifully.  My secret is to start with the lightest color so you don't contaminate your blending tools and get a smoother look, so I started with Spiced Marmalade Oxide Ink at the bottom and Seedless Preserves Oxide Ink for the up part.  In the middle where the two colors meet all you have to do is splash some water and it would look awesome!!! I traced and cut a hill, I sponge it with Peeled Paint Oxide Ink and adhere it to my card base to be the ground for my scene.


I glue the house silhouette and also the moon.  To  make the moon I sponge a circle die cut with Pumice Stone regular distress ink and splash some water with a distress sprayer.  To add more texture you can also sprayed  it with some shimmer.


I finally stamped and color the witch cat from the Newton´s Boo-tiful Night and the Newton from
Newton´s Costume Party and added the Mask so he can also be dressed up for halloween.  I stamped 3 bats with Versafine Onyx Black ink for a more spooky feel and added the sentiment from the Spooky Skeletons set.


I love to mix sets to create cards and Newton's Nook stamps are great to do that!!! I hope you liked my card today!  

Have a Spook-tacular Day!!

Friday, June 30, 2017

Gems and Trolls

Hello CDD Friends Waleska here to share with you a very magical card with our cute and famous Trolls and the very versatile Garden Border Die... Aren't you just loving all our border dies?


CARD DETAILS:

I started with the night sky, and my two favourite colors to create a very easy night sky are Distress Inks in colors Blue Print Sketch and Black Soot.  I put a light blend of the blue and added the black only on the edges and blend both to create the night sky.  I cut a longer piece of the border die to mask the border of the soil to create a light halo for all the gems, for that I used Distress Oxide Ink Fossilized Amber, for the soil I used regular Distress Ink Walnut Stain with water splashes.


I color all the Trolls  with markers to coordinate the scene.  For the gems I used the same colors of the Trolls and added stickles for sparkle.


I also added little white dots with a gel pen along the card  to create stars and with Versafine Ink I stamped the sentiment.

I love how you can tuck almost anything into the Garden Border die... I tucked the little diamonds, but you can put vegetables, flowers, plants this is a great die for many different types of cards.


I hope you can be inspired to create a magical card for someone special for you, and you can create night sky very easy.

Have a Wonderful day!!


Products Used: