Tuesday, April 17, 2018

Embossed Foiled Card Accents/Brutus Monroe and ThermOweb Week!!


Hello Friends, Thank you for stopping by my blog for another Wednesday Quick Tip using Brutus Monroe stamps and products, this week is special because this week Brutus Monroe is collaborating with ThermOweb, and both Design Teams have created amazing projects featuring lots of techniques and products....  You can find the blog hop at the Brutus Monroe Blog.   My projects today will have lots of shine and foil... I went a little overboard and have many cards to share with you!  Today is all about sets of cards... because we always need a THANK YOU card on hand!!!


CARD DETAILS: 

Have you ever wonder if you can foil embossed cards? well the answer is YES!!! For my cards today I did a little experiment and love the end result.... 
I started embossing several white card bases with some of my favorite Brutus Monroe Embossing Folders, I then ink blend the embossed white card bases with Oz Surface ink.
With a sponge I put a thin amount of transfer gel onto the panels and let them dry.  I really try to get into the embossed areas to have a smooth foiled background.  After they were dry I run them into my Minc Machine.


After I created the foiled embossed panels I cut them and adhere them to a white panel and then to a black card base, I love the look of them, on some designs you can see the Oz surface ink color, like on the wild cherry foil and with other foil colors the ink blends perfect with them.  I used Jade Foil and Gold Shattered Glass.


I added the thank you sentiment in black to match the card base.


Aren´t this just beautiful!!! I love the simple, yet elegant look of the emboss and foil......


For my next project I used Clear Designer Toner sheets, this are beautiful to create all kinds of cards....I don't know you, but I love all my foiling sheets that I don't want to waste any of it so for my next set of cards I used both the foiled clear toner sheet and the remaining.


To adhere the Foiled clear toner sheets and remaining foil to the card base I used a little of the Brutus Monroe craft glue in the top and bottom, and to cover the glue, I cut a small strip of cardstock and glue it on top of the foiled pieces.


I did the same thing with the rest of the cards and for the thank you sentiments I used ThermOweb toner sheets to create the different color thank you dies.


I had so much fun creating this two sets of cards, that are now ready in my stash to give to someone special!


To get a chance to win this amazing prize all you have to do is visit the Brutus Monroe Facebook page, like it and leave a comment.  You can also enter on the ThermOweb page!!!


Now is your turn, create amazing projects with Brutus Monroe and ThermOweb products and give some fabulous shine to all you do!!!  I hope you can be inspired with my projects today!! Don´t miss anything and hop along with us!!!

WALESKA GALINDO ----You are here

Have a wonderful week!


Brutus Monroe/ThermOweb Supplies:
(Clickable Links)


Kindred Stamps April Release Blog Hop featuring Family is Forever

Hello Friends, today I am super excited to introduce you to one of the new and adorable Stamp sets from the Kindred Stamps April Release:  Family is Forever... I love this little girl and friend enjoying the sun and beach that I created not one but three cards showcasing this amazing new set.


CARD #1  DETAILS:

I started creating the background for this cute friends, I almost always like to use two or three tones on my cards to have a harmonic effect.  I wanted to create a beach scene with warm tones, to do that I used oxide inks in colors, squeezed lemonade and worn lipstick.  I then stamped and color the cute girl and friend with markers.  I color the sea water with salty ocean oxide ink and some water splashes, for the palm tree and sand I used kraft cardstock  and for the palm leaves I used oxide ink cracked pistachio.


I finally added some white clouds and stamped one of the sentiments from the stamp set OHANA!! I have to say I am in love with this cute couple of friends you can use for many occasions and for many different scene cards.  I hope you can be inspired to create something amazing with the new Kindred Stamps Family is Forever stamp set.

CARD #2 DETAILS:

For my card #2 I cut a white card base and smooshed the lightest oxide ink color Squeezed Lemonade after that I also smoosed Worn Lipstick and Salty Ocean mixed with water.  I colored a bunch of tropical leaves with Cracked pistachio Oxide ink and for the flowers I used markers as well as with the cute little girl I finally stamped the word ALOHA and added some sequins.


CARD #3 Details

I again used the same colors to create a little scene, I cut an oval from the white card base to be the window and adhere it to the back of the card also with the waves.  I colored the cute little girl and friend and adhere a bunch of leaves colored again with  Cracked Pistachio.  I adhere the characters with foam tape and add a little bit of shine with sequins.


We've been changing things up this month, and we've introduced a Design Team to our group! These ladies are INCREDIBLY talented and will be with us for the next several months! We couldn't be more excited to be working with them! We also have Guest Designer Lois with us AGAIN, because we love her so much.

Please visit their blogs, and ours, and comment on all the blog posts. Doing so will make you eligible for winning shop credit! The winner will be chosen Friday evening, the night of the 20th, and will be announced in our Fan Club!


Take some time to visit the rest of blogs for more inspiration on this amazing release you will love as always!!!


Crafting Love -----You are here

Have a Nice day Friends,


Thursday, April 12, 2018

March Sneak Peek Day 4

Hello Crafty Friends, Waleska here with you today to showcase the new stamp set "Friendship" from our April Release.  The entire release will be available tomorrow in the shop!!! So don't forget to start making you wishlist!!!


CARD DETAILS:

For my card today I started die cutting the beautiful Flower Border Die, I masked the flowers and ink blend the little hill with Cracked Pistachio Oxide Ink starting on the bottom and leaving some white parts at the top for a faded look, I also added water splashes.  I colored the flowers with markers as well as the center of the flowers.  With this card I tried to use a three color palette for a harmonic look. 


I ink blend the card base with Peacock Feathers starting again from the bottom  and leaving a white space at top and  added water splashes.  I colored the cute critter relaxing with markers in the same colors I already used, and added the sentiment with the banner that comes on the Fancy Frame dies.


I hope you are as excited as we are with this amazing Release!!! Thank you for stopping by today!  Have a wonderful day!!! and HAPPY SHOPPING!!!


CDD Supplies:


 Flower Border Die

 fancy frame dies

 cracked pistachio oxide ink

peacock feathers distress ink


Wednesday, April 11, 2018

Clown Placement Cards/ Brutus Monroe April Stamp Club

Hello Friends, thank you for stopping by my blog for another Wednesday Quick Tip using Brutus Monroe stamps and products, every Wednesday you can find a blog hop at the Brutus Monroe blog featuring the product of the week!!! You can find the hop HERE.   This week we are featuring the new April Stamp of the Month.

If you are not familiar with this program let me share with you...What is the Brutus Monroe Monthly Stamp Club?

With the monthly stamp club you will receive a 2x3 stamp set for only $5 which includes your shipping and handling! The stamp set is designed each month by Christopher and will be shipped out to you by the 15th of the month (excluding holidays, in the event of a holiday falling on shipment day the stamp will ship on the next business day)
To received the current months stamp you must order by the last day of the current month. Your first charge will incur the day you sign up for the club and on the first of the month, every month thereafter. 


 Monthly Stamp Club

PROJECT DETAILS:

To create this project I took out my Silhouette Cameo, I haven't used it in a while.  This cute stamp remind me of a Birthday I went some time ago... I was great! the theme was the circus and everything was decorated.  There were lots of different candies on a table and the kids were going crazy with them!  I love everything but, had some questions about the food and candies and I thought it would be great to have some placement cards with the names of the food so the guests can know what to eat... Well after my long explanation, lets go to my project... I first color the cute clown and cut it out.  I cut the place card file with my silhouette and added a red rectangle to add color to my project! I adhere the clown with 3D foam and added Nuvo drops it.


There are many ways to use this little sets for different projects.  Take out your cutting machine and use your Monthly stamp sets....


I hope you have a great week! and can be inspired with all the projects the DT share today! 

Hugs,


Friday, March 30, 2018

Favorite Oxide Ink Colors

Hello Friends Waleska here to share some of my favorite Oxide ink color combos, I am a cardmaker and almost all my friends know it, so when I attend any celebration most of them expect a card from me... many times ( I know shame on me) I find myself looking for cards to give to my friends for different occasions.... Does that happen to you too? Well I created this set of cards, thinking in those situations, with the new and lighter Oxide Ink colors there are lots of combinations you can do... let me share my favorite, and some quick and easy cards any of your friends would love to receive... who wouldn't love a cute Monster card right?

CARD DETAILS:

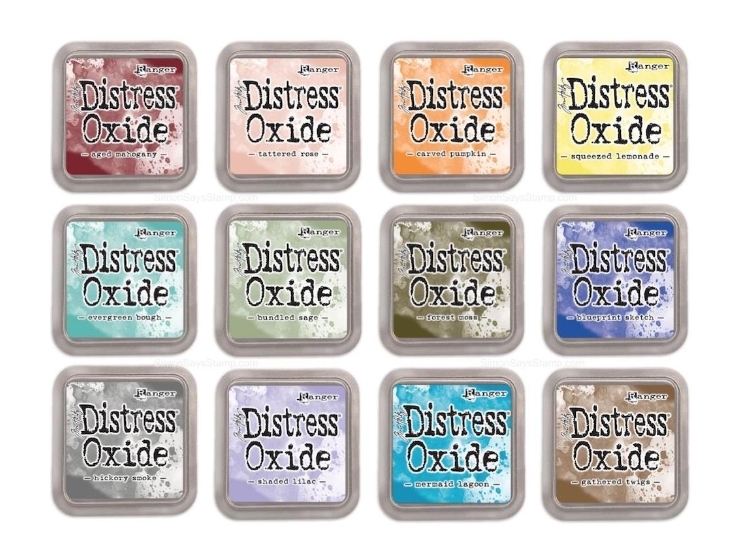
The new Oxide Ink colors are beautiful, some of them are lighter and because of that you can mix them with almost any other Oxide Ink Color.  I especially love the Squeezed Lemonade here are my favorite combinations with that specific color.


I started ink blending the front panels with the squeezed lemonade Oxide Ink, mixed with Abandoned Coral, Spiced Marmalade, Twisted Citron and Worn Lipstick, I also added water splashes so the colors can blend more easily.


Here are the color combinations.  Did you know you can find Oxide Inks on the CDD shop? You can find them HERE.


My idea was to create some quick cards that I can have on my stash, for any occasions.  I cut all the panels with the Fancy Frame dies and also die cut the second small from the Inside Scalloped circle die and color four adorable monsters from the Monster Carnival set and add some sequins as embellishments.... 


I left enough space on the cards to add any sentiment I need when give this set of cards, you can either use a banner or stamp the sentiment on the bottom of the card, this cards can be great for birthday, congratulations, get well or any encouragement card.


After I finish my cards I saw the left over pieces which also can be used to create other cards with colorful frames.


I hope you like this set of quick colorful cards you can create for any occasion, if you are like me... This can be great so you are always prepared to give a card.

Have a Wonderful day!


CDD SUPPLIES:


 Monster Carnival