Monday, October 9, 2017

Trick or Treat Newton's Nook Guest Designer

Hello Friends, Waleska here from craftinglovew with another halloween card. (I told you I am a HUGE Halloween fan) I used our friend Newton in different costumes for a fun Trick or Treat scene.


CARD DETAILS:

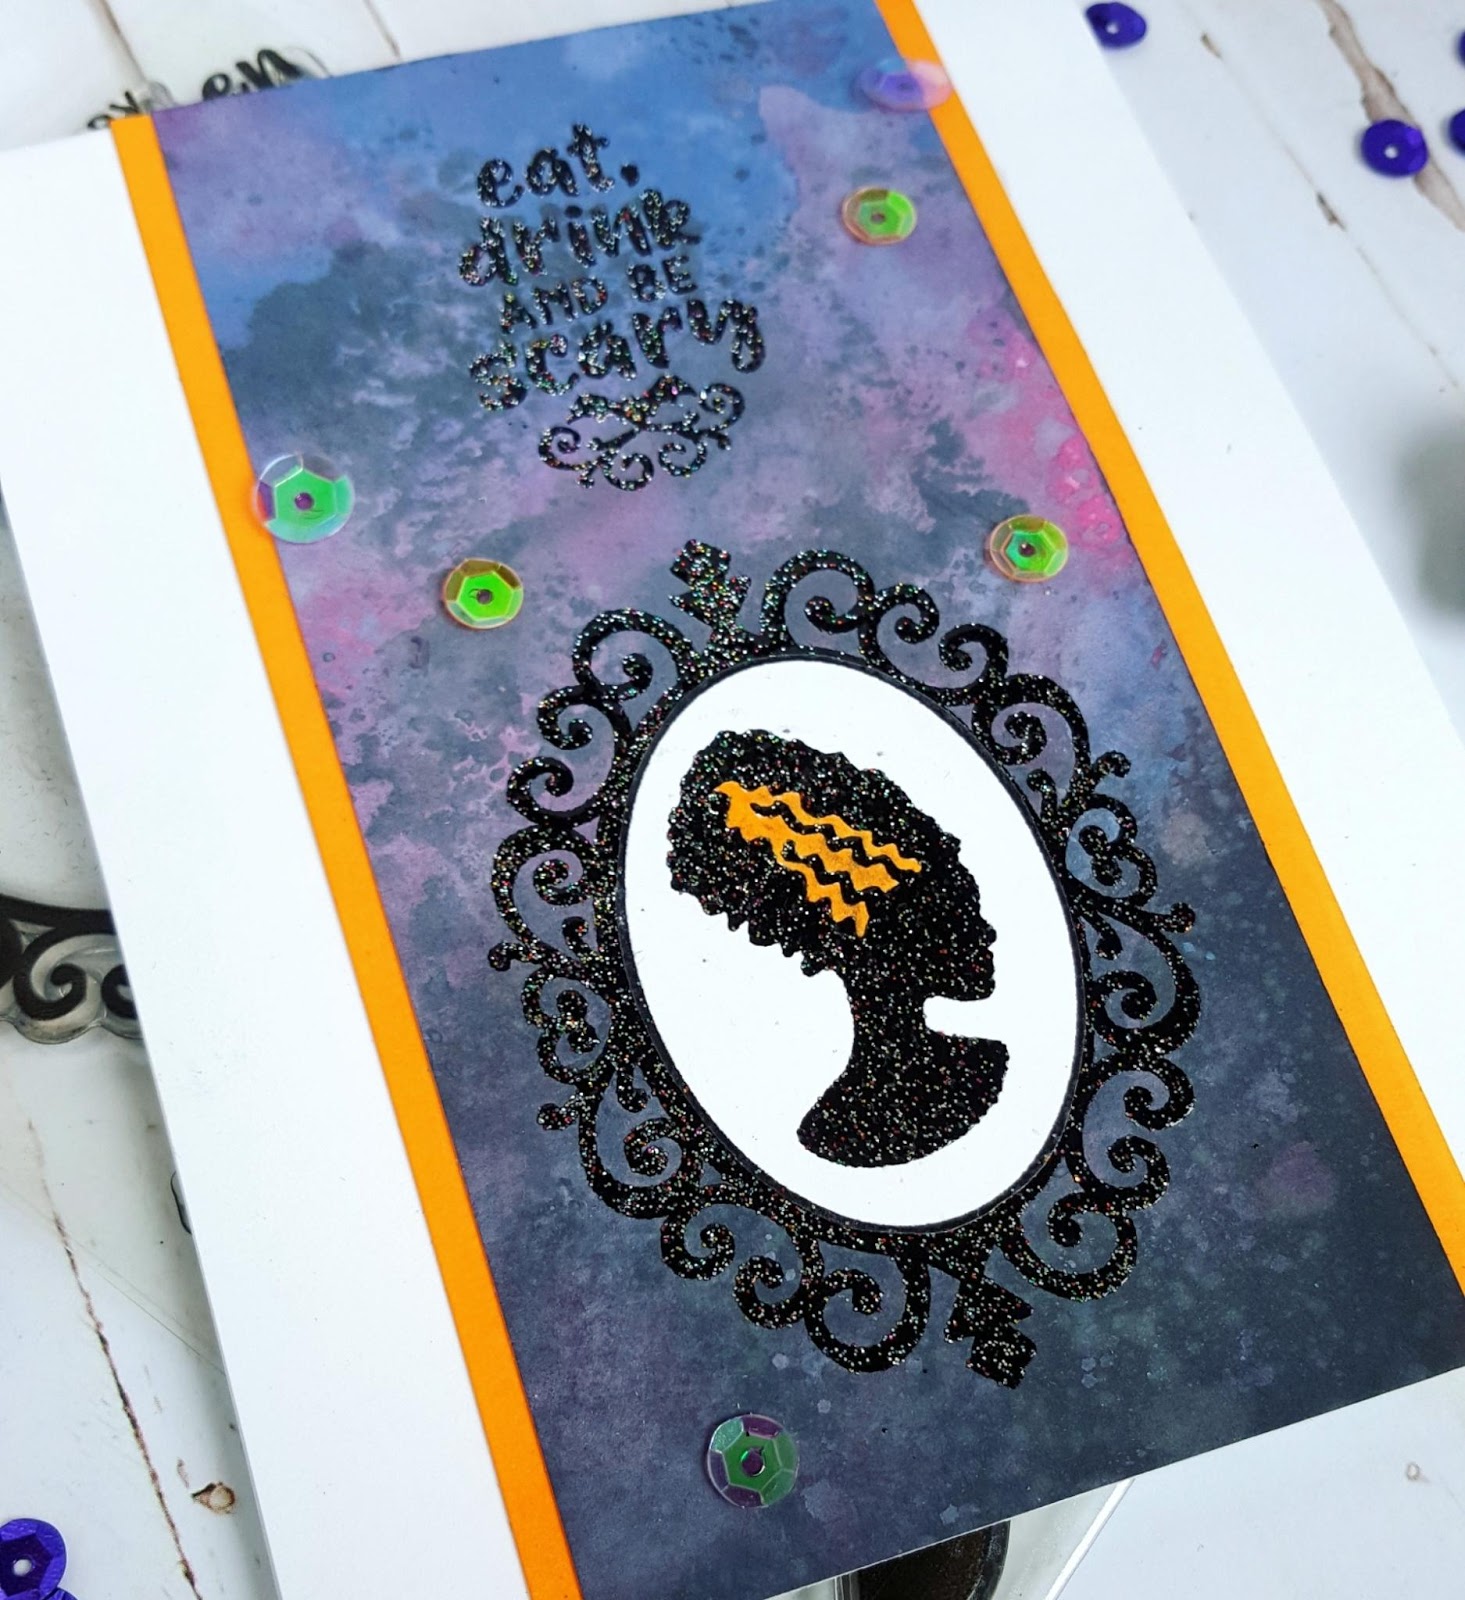
For the background  of my card today I used oxide inks, and because they blend so well you can almost mix any colors beautifully.  My secret is to start with the lightest color so you don't contaminate your blending tools and get a smoother look, so I started with Spiced Marmalade Oxide Ink at the bottom and Seedless Preserves Oxide Ink for the up part.  In the middle where the two colors meet all you have to do is splash some water and it would look awesome!!! I traced and cut a hill, I sponge it with Peeled Paint Oxide Ink and adhere it to my card base to be the ground for my scene.


I glue the house silhouette and also the moon.  To  make the moon I sponge a circle die cut with Pumice Stone regular distress ink and splash some water with a distress sprayer.  To add more texture you can also sprayed  it with some shimmer.


I finally stamped and color the witch cat from the Newton´s Boo-tiful Night and the Newton from
Newton´s Costume Party and added the Mask so he can also be dressed up for halloween.  I stamped 3 bats with Versafine Onyx Black ink for a more spooky feel and added the sentiment from the Spooky Skeletons set.


I love to mix sets to create cards and Newton's Nook stamps are great to do that!!! I hope you liked my card today!  

Have a Spook-tacular Day!!

Tuesday, October 3, 2017

Eat, Drink and Be Scary


Hello, It is time for a new Inky Paws Challenge at the Newton's Nook blog this time is a color inspiration! I love it because It screams HALLOWEEN!  and I am having so much fun creating with the newer stamps.


Image may contain: text
Here is my take on this color challenge! I always like to take the colors of the challenge and only use only the inspirational colors!


CARD DETAILS:

I created the background with oxide inks Wilted Violet, Seedless Preserves and Black Soot with a smooshing technique.  That is smooshing all the colors on your craft mat add a little water and start putting all the colors on your white card base until you are ok with the mix. I cut a stripe from the background and stamped the frame and the sentiment with versafine onyx black ink, I added black sparkle embossing powder to all the black stamping. To use the orange I added some touches in the hair and I color some border stripes with the same maker color.  To finish it up I used some sequins. 


Here is a closer look to my card! I hope you like my card and can join me for my Halloween Card Series 2017 on my instagram account HERE where I will be sharing one halloween card daily until October 31st... YES that is 31 cards! I hope you have a spooktacular day!


Monday, October 2, 2017

Spooky Halloween Decoration

Hello Friends Waleska from craftinglovew here... I am so excited to be Newton's Nook October Guest Designer thank you so much for inviting me. I first have to admit I am a Halloween lover so this past Newton release was just too awesome and perfect for me, I am using a lot of the new stamps and I am having so much fun with them.


CARD DETAILS: 

For my first card I used almost all of the stamps from the Spooky Skeletons. I love to create little scenes on my cards, so the idea for this one was a very Spooky Halloween Decoration. I first stamped the skeletons in Onyx Black Versafine ink and put Black Sparkle embossing powder to have shinning Spooky Skeletons!!! I cut them and set them aside to make the background.


For the background I used Spiced Marmalade Oxide ink and some water splashes.  I also sponged the edges with Walnut Stain regular Distress Ink to give the card a more spooky feel. I stamped in the center of the card the amazing frame or mirror (you can use it for both) from Creepy Cameos with Versafine Onyx ink and  also put Black Sparkle embossing powder to unify the sparkle vibe on my card.  I create the inside part of the frame by cutting an oval from gray cardstock.


I finally cut a strip of gray cardstock and sponge it with Walnut Stain Distress ink to create the shelf for all the Halloween Spooky Decor and raised all the images with 3D foam... What do you think? Creepy enough? I just wish I have this awesome skeletons to actually decor my living room like this...  I hope you like my card and get some inspiration to start creating halloween cards.  

Have a Spooktacular Day!


You might also be interested on this posts:


Friday, September 22, 2017

Shaker Scene Card

Hello Friends, Waleska from craftinglovew here... thank you for stopping by.  Today I want to share with you a Shaker Card where the focal point is a fall scene with a cute critter from the Timber stamp set.


CARD DETAILS:

I started creating the scene, inside the smallest rectangle from the Inside Scalloped Rectangle Dies.  I measure the rectangle and cut a piece of  white cardstock  to fit the rectangle.  I sponge the piece with Spice Marmalade Oxide Ink and flick some water splashes, I also die cut a craft cardstock hill from the Outdoor Landscape Dies and some trees from the new Harvest Border dies.  


To create the little leaves I die cut several  of flowers that come in the Inside Scalloped Circle die and cut the petals to create little leaves for the fall scene, I color them with Spiced Marmalade and Peeled Paint Oxide ink. I color the cute critter with markers and assemble the shaker card.  I also used Fall Harvest CDD Sequins mixed with the little leaves, that look perfect with the colors of my scene.


Because I wanted the scene to be the focal point on my card I put the sentiment inside the card and put two layers of white paper cut with the fancy frame dies on the front part of the card.


I hope you like this idea of making little scenes with your favorite critters to create a beautiful focal point in the front of your card.  Have a nice day.


CDD Products:


Monday, September 11, 2017

Newton´s Happy Halloween


Hello Friends, today I want to share a card I created for the Inky Paws Challenge, with Newton's Nook products... I will be having some great news in October related this cute cat stay tuned..... Now for the challenge today I was inspired by sketch #55 for my card.


CARD DETAILS:

For this card I used a pattern paper for the background that I inked with Carved Pumpkin Distress Ink on the edges to create a more unify design with the colors.   The center of my card is of course Newton with a bunch of halloween pumpkins I colored them with markers, this cute cat is from the Newton´s Boo-tiful Night stamp set, I used the bats and the sentiment also from the same set.  I embellished the card with sequins in the same colors.


I hope you like my take on this challenge!!! I hope you have a great day!


Tuesday, September 5, 2017

Day one Craftin Desert Divas Release!!!

Hello CDD Friends Waleska here, with DAY 1 of our September release!!!! Who is ready for some Spooktacular new stamps and dies? Today we are Sneak Peeking the cute Frightfully Sweet stamp set! Perfect for your Halloween projects!!!


PROJECT DETAILS:

For this cute Halloween treat boxes I die cut four bags from the Treat Box Die in orange cardstock 
to see how to assemble this box die please visit the Craftin Desert Divas Youtube channel HERE.
I created some little scenes with the our new cute Halloween Trolls.  For the spooky ground I die cut some black grass from the Outdoor Landscape 2 Dies.  All the images are colored with markers and you can make all kinds of color combinations for this halloween season with this cuties.  


I also decorate the bags with the star that comes in the Treat Bag die, I thought you can put the kid's name guest to your party on the star so everyone has a personalized bag!!! you can also make a banner or some fun invitations with this halloween characters!!!


Make sure to head over to our Facebook September Release Event to check out more on this release, more peeks and surprises!!!  If you are interested in any of the supplies the dies are listed below but remember this new stamp set  will be available on 09/08/17... Stay tuned for more new stamps and awesome dies you will love !!! Happy day and Happy crafting to everyone!!


CDD Products:


Thursday, August 31, 2017

3D Dino-mite Card!!!

Hello CDD Friends, Waleska from craftinglovew here to share a very fun card with a 3D effect with one of the cute characters from  Dino Dig... I hope you are ready for our all NEW and AMAZING September release that will be coming soon!!! 


CARD DETAILS:

For this card I started with the inside part of the card, for that I cut a piece of  paper 11x4.5 inches, I centered and die cut a square window and make two marks of 1/2 inch in the up part of the square with a scoring board and fold them to create the 3D effect.  I also scored at the bottom of the square to create the folding window.


After that I die cut and glue another window from a Dinosaur pattern paper for more sturdiness to my window.  I planned and color my scene with this cute dino guy running away from the stones.  I die cut two of the garden border dies to create the ground for my image and glue it to the back of my card frame, after that I created the night background with Chipped Sapphire and Black Soot distress inks. 


I glue my 3D Window to a top folded card base in the upper and down part of the card to create the 3D effect and double folded all the creases to make sure my card will pop up when it is open by the recipient.  I finally added the rest of the images and the sentiment with glue.  


I left the outside of the card very simple because of the inside Surprise! I had so much fun creating this 3D card.  I hope you have a great starting Month tomorrow! 

Hugs,


CDD Products used: