Showing posts with label scene cards. Show all posts

Wednesday, June 27, 2018

Sea You Soon! Good Bye to the Drive by Crafts Design Team...


Hello Friends Waleska here from craftinglovew with my last post on the Drive by Crafts Design Team.  Time definetely flies when you are having fun!!! I loved my time on this team and sharing with you my ideas!!! For my last card of course I wanted to create a scene with some of my favorite Lawn Fawn sets from all time, some old and some new!! This long card is very colorful and shows lots of different characters and must haves if you are like me and enjoy making cute cards.


CARD DETAILS:

I started with the card base which is a letter size sheet fold in half, I cut 2 inches so it can fit inside a long business envelope.  I cut different sizes of water waves and colored them with oxide inks in colors: Faded Jeans, Peacoack Feathers, Mermaid Lagoon and Salty Ocean.  For the little island I used Kraft Cardstock, I splashed all the waves with water for a realistic water look. 


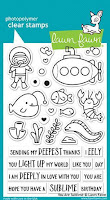
For the sky I used Squeezed Lemonade and Carved Pumpking Oxide Inks.  I planned my scene from top to bottom, my inspiration was an image I found of the ocean with lots and lots of little fishes.  I started stamping and coloring all the characters I wanted to use and placing them on the card without adhering them.  I build this big scene little by little and I tried to use kind of the same colors for a harmonic feel.


After I knew exactly where I wanted all my images I started adhering them to my card, with glue and some with 3D foam.  I used a white gel pen to draw attention to some parts of the images and some glitter glue for sparkle.  I finally stamped the sentiment with black ink.


I hope I inspire you to mix and match some of your stamp sets with this card!!!! I had the best time on the Drive by Crafts Team, I learned a lot and made some great friends!!! Take care and thank you so much for all your kindness during my time as a DT Member!!! 

Keep on Crafting!!!

Love,


Drive By Crafts Supplies:


You are Sublime Stamp Set   

Wednesday, May 30, 2018

Birthday Bus to a Beach Party!

Hi Everyone, today I have a fun and colorful birthday scene card with the adorable Birthday Bus critters from Avery Elle.  I've wanted to create a card with this fun little set for a long time, I am so happy I could finally use it... I love this little stamp sets from different companies because the prize is great and you can pair them with lots of other sets you already own.  You can find this and other small stamp sets at the shop.


CARD DETAILS:

My creating process starts with a color combo I want to use for the entire card, I almost always try to use only the colors I choose, three or four colors I find work great for a design.  I color the cute birthday bus with markers in the colors I already choose to start and work from that. 


I then started with the background, to color the background I used Mermaid Lagoon Oxide Ink with some water splashes.  I cut a strip of black cardstock for the road and with a wave die I cut from kraft cardstock the sand, I wanted this party to be at the beach.


I adhere everything to the front of the card and frame the scene with a rectangle frame die I colored in the same hot pink color I used on the bus...to complete the beach look I needed a palm tree, this palm tree is part of the MFT Beach Scene Builder Die-namic, (a must have die set, if you ask me), I colored it also with markers.


I finally stamped the sentiment with black ink and added some nuvo drops in the same tones.  I hope you like this happy birthday beach card,  I wish you have a wonderful rest of the week...

You can find this and other awesome new products at the Drive by Crafts shop, and if you want to save some money don´t forget to use the code:


Have a great day!!!


Thursday, May 24, 2018

Cactus Coffee Lovers Hop


Hello Friends, today I am participating on the "Coffee Lovers Hop" with this really cute Cactus Card "Yeehaw" I don't drink coffee at all but Craftin Desert Divas Digital Stamps are too amazing to pass.. have you check them out? In the Shop you can find all kinds of Digis for many occasions and the price is unbeatable!!! Let me share with you how I did it this card:


CARD DETAILS:

I started with the background ink blending two oxide inks,starting with Squeezed Lemonade then Worn lipstick, after this two mixed very well together I add some water splashes and I mixed the mention colors before with water and did more splashes!!  I love this look, to break those two colors I also added Lucky Clover splashes. I die cut with kraft cardstock the southwest border and colored the little cactus in the back with the same green I used for the big mugs in the front.  I love working with Digital Stamps, What to know why? Well they can be resized, you can print as many as you want and have them ready to color, you can make scenes with them, or make really simple cards and you can also save some money with them!  If you haven't used them I encourage you to try them Craftin Desert Divas has an amazing selection of this Digis you can find them HERE.


Have a wonderful day!


CDD SUPPLIES:


Friday, April 20, 2018

Two Tone Scene Card

Hello Friends Waleska from craftinglove here, I love the Waffle Flower Hooray Stamp Set, the images are very unique and cute. Sometimes when I need some inspiration to create my cards I look for the image designers, and for this card I was very inspired by Helen Dardik the creator of this beautiful images. You can check her beautiful artwork on her instagram account.


CARD DETAILS:

I started laying out my images and making masks for them, I masked the hill with post it sheets and stamped all my images with Blueprint Sketch Oxide ink, I let them dry and masked all the images. I sponge the background with Worn Lipstick Oxide ink and added some water splashes. I let that dry a little and add some splashes with the blueprint sketch and worn lipstick mixed with water, I also added gold watercolor splashes for a little sparkle here and there.


I wanted a two tone card, so to make the card base match perfectly, I sponge the edges of a card base with blueprint sketch oxide ink and added the fun sentiment with the same color.

Here is a closer look of the gold splashes and the masked images, if you check out Helen Dardik artwork you will see that sometimes she leaves her images white and she uses lots of blue for them.


I hope you like my card today and can be inspired to sometimes think outside of the box on your card designs and look for inspiration everywhere.

Remember you can find the lots of great products at the Drive by shop
and if you want to save some money on your next purchase use the code:

SHOPWALESKA
and save 10% on $25 or more

Have a nice weekend!


Supplies used:

Tuesday, April 17, 2018

Kindred Stamps April Release Blog Hop featuring Family is Forever

Hello Friends, today I am super excited to introduce you to one of the new and adorable Stamp sets from the Kindred Stamps April Release:  Family is Forever... I love this little girl and friend enjoying the sun and beach that I created not one but three cards showcasing this amazing new set.


CARD #1  DETAILS:

I started creating the background for this cute friends, I almost always like to use two or three tones on my cards to have a harmonic effect.  I wanted to create a beach scene with warm tones, to do that I used oxide inks in colors, squeezed lemonade and worn lipstick.  I then stamped and color the cute girl and friend with markers.  I color the sea water with salty ocean oxide ink and some water splashes, for the palm tree and sand I used kraft cardstock  and for the palm leaves I used oxide ink cracked pistachio.


I finally added some white clouds and stamped one of the sentiments from the stamp set OHANA!! I have to say I am in love with this cute couple of friends you can use for many occasions and for many different scene cards.  I hope you can be inspired to create something amazing with the new Kindred Stamps Family is Forever stamp set.

CARD #2 DETAILS:

For my card #2 I cut a white card base and smooshed the lightest oxide ink color Squeezed Lemonade after that I also smoosed Worn Lipstick and Salty Ocean mixed with water.  I colored a bunch of tropical leaves with Cracked pistachio Oxide ink and for the flowers I used markers as well as with the cute little girl I finally stamped the word ALOHA and added some sequins.


CARD #3 Details

I again used the same colors to create a little scene, I cut an oval from the white card base to be the window and adhere it to the back of the card also with the waves.  I colored the cute little girl and friend and adhere a bunch of leaves colored again with  Cracked Pistachio.  I adhere the characters with foam tape and add a little bit of shine with sequins.


We've been changing things up this month, and we've introduced a Design Team to our group! These ladies are INCREDIBLY talented and will be with us for the next several months! We couldn't be more excited to be working with them! We also have Guest Designer Lois with us AGAIN, because we love her so much.

Please visit their blogs, and ours, and comment on all the blog posts. Doing so will make you eligible for winning shop credit! The winner will be chosen Friday evening, the night of the 20th, and will be announced in our Fan Club!


Take some time to visit the rest of blogs for more inspiration on this amazing release you will love as always!!!


Crafting Love -----You are here

Have a Nice day Friends,


Monday, October 30, 2017

Spooky Halloween Decoration Card

Hello Friends Waleska from craftinglovew here, with my last post as the October Guest Designer... (sad face) I had a blast during this month sharing with you a little bit of my Halloween Card Love!!! Tomorrow is Halloween and for today's card as you already imagine I did another Halloween Card! I just can't stop, Newton's Nook stamps are so awesome!!! I hope your halloween decorations are up and you have your costume ready!!! This card was inspired on my own Halloween decorations! Every year the Halloween decoration of my fireplace is very special for all the family!


CARD DETAILS:

I started with a cream card base, I sponged the edges with Walnut Stain Distress Ink, to make the down part of the wall I used a scoreboard and score every 1/2 inch to create a wall texture and sponge it again with Walnut Stain Distress Ink to accentuate the raised lines.  I cut a strip of cardstock in the same color and adhere it to the scored panel. I stamp the spooky frame  from Creepy Cameos and the spooky skeleton with versafine ink and clear embossing powder.  I die cut a gray fireplace with a brick stencil and walnut stain distress ink I created the brick look.  I decorated the fireplace with some of the SpookySkeletons animals and I also added bats and spooky pumpkins! 


Thank you so much for stopping by and let me share with you all this Halloween cards! I hope you have an Amazing day! I am very grateful to Newton's Nook  for the opportunity to share with you my love not only for halloween cards but for Cardmaking! I send you:

Hugs, Love and a Spooktacular Halloween!!!