Wednesday, January 31, 2018

Adding Dimension with Glossy Accents and Nuvo Sparkle Dust

Hello Friends, Waleska from craftinglovew here to share with you some ideas on adding dimension with Glossy Accents and Nuvo Sparkle Dust.  There are many ways to add dimension and accentuate your cards, but this is a very easy way to use what you already have at home to create beautiful sparkle and shine to your card.


CARD DETAILS:

I started die cutting the new balloon border die from the Party Border dies and I cut individual balloons. 

I colored a bunch of balloons with oxide ink colors Cracked Pistachio, Worn Lipstick and Fossilized Amber and set it aside to create the card background.  For the background I put Cracked Pistachio Oxide ink with a little water to my mat and smooshed the card base.


After that I adhere  some balloons to a tape strip and put a first coat of Glossy accents and Nuvo Sparkle Dust to each of the balloons, because the dust is so fine the color of the balloons stay almost the same, I let it dry and after that put a second coat of glossy accents to seal all the fine glitter and give the balloons more dimension.


Here is a closer look of the balloons with the second coat of glossy accents and the Sparkle dust already sealed on the first coat... I looove all the sparkle and shine!!!


I die cut the awesome Stitched box die  with Kraft Cardstock (this die was made to have dimension and give a 3D look).


I adhere the piece with the balloon box to a Kraft cardstock and then to a white card base, I added some sequins for more color and stamp the sentiment!! 


I hope you like my card and can give this idea a try! This card design can send happiness to anybody special to you!  Have a great day!!!


CDD Products:


Thursday, January 18, 2018

It Moose be Love/ Zig Markers

Hello Friends! February is approaching fast and the love cards will start popping more and more on my social media!!! This one is one of my first Love cards...This one is for one Challenge I dearly  love...the Lawnfawnatics challenge... because as I have declare it before I am a total Lawn Fawn Lover!!! One of their sets was my very first stamp set I bought, and that was it... I got in love and obsessed for the rest of my life!!! 


CARD DETAILS:

It moose be love!!!  I started stamping the cute mooses, for the reverse image I used the Mini Misi.  To color the images I used my Zig Clean Color Real Brush markers, in colors:
Beige
Dark Brown
Brown
Mid Brown
For the background I used Oxide inks Cracked Pistachio and Peacock Feathers for the grass, and Candied Apple with water splashes, I die cut the small hears that come in the Lawn Fawn pop up box die and colored them with Zig Light Carmine, all of this was colored on watercolor paper... 
I hope you have a great week! Thank you so much for stopping by, remember you can find me on instagram with lots of ideas, projects and inspiration:


Monday, January 15, 2018

Normal is Boring... Who is with me?

Hello Friends!!! Today we start a new week... my kids finally started school and here in Guatemala is freezing!!! but today I am so excited to share my card for my Brutus Monroe Monday Blog Post!  The first time I saw this stamp set I just love it! It is called BE UNIQUE and it comes with lots of amazing sentiments like this one... NORMAL IS BORING... I love it and live it every day, because definitely I am not NORMAL...hahaha anybody that knows me can tell you that!! Well now to the card.


CARD DETAILS:

I started with a white card base, I inked with Brutus Monroe Embossing ink and the Pugsley Stencil, I did a quick pass through it because I wanted a very organic look to it.  I added Icible Brutus Monroe Ultra Fine Embossing Powder.  I smooshed my current favorite Oxide colors Cracked Pistachio and Peacock Feathers, I also added some water splashes mixed with Salty Ocean and  Seedless Preserves.  I color the bunny with  Zig Clean Color Real Brush markers with the same colors from the background to unify the design. 


I adhere the piece to a black card base and stamped the awesome sentiment with Versafine Onyx Black ink and clear embossing powder.


I loved the end result of this card and hope you liked it too.
Have a great day!


Main Brutus Monroe Products used:

Friday, January 5, 2018

Adding White Embossing details to Watercolor

Hello my Craftin Desert Divas Friends, Waleska from craftinglovew here with a little tip to add snow elements to your watercolor cards! After this card, I think I am going to use more my Zig Clean Color markers... Do you have materials in your desk you've been wanting to use for a long time?  Well that happen to me and the Zigs, so is a good resolution for this 2018 to start using all those materias, don't you think? I had so much fun creating this card with this adorable images!!! Let me share with you my little tip:


CARD DETAILS:

I started creating my background piece with a watercolor card base, I added snow dots with a Ranger Embossing Marker and added white embossing powder.  Since the embossing powder resist the watercolor it works great to create a snow background.


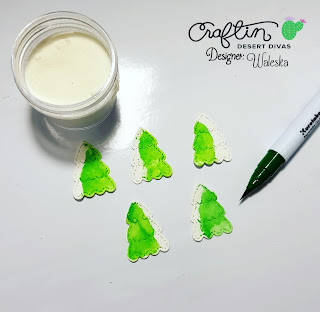
After that I created some snow covered trees.  I put some embossing ink on the corners of the trees and added the white embossing powder snow details, and put the green color with the Zig Clean Color markers.  I color the bear and cute penguin with the same markers.


I finally added white embossing powder to the bottom part of the card to simulate ice and stamp the sentiment with Versafine Onyx Black ink.


White embossing powder looks bright even with the different watercolors on top.  I hope you can give this idea a try! 


Have a wonderful Day!


CDD PRODUCTS: