Showing posts with label butterfly reflections ink blog post. Show all posts

Friday, August 11, 2017

Make a Splash/ Transparent Ocean with Vellum

Hello Card Making Friends Waleska today with a full beach card with the cutest Summer Critters from Neat & Tangled I am really loving this set... Which one is your favorite Summer set so far?


CARD DETAILS:

I started with the background using Distress Inks in colors Squeezed Lemonade and Carved Pumpkin.
I cut the waves with the Lawn Fawn Stitched Hillside border die in Vellum Paper and colored them with Distress Oxide ink in color Broken China. For the Sand I also used the same die in desert storm cardstock and give it a little color with Distress Ink Walnut Stain.


I stamped the cute Neat & Tangled Beach Day critters with Versafine Onyx Black ink and added Clear Embossing Powder. I color them with markers in the same color combo.


I put  Embossing Powder to one of the waves for a sparkling effect and adhere all the elements with Mono Multi Liquid Glue. I finally added the Postage Stamp Elle-ments to frame the cute scene. 


I wanted to create a water look to my card and vellum is great for that!!! I hope you like my project today and you are enjoying your summer time!


Sea you soon,

Waleska

Thursday, August 10, 2017

Reverse Confetti Pattern Paper Card

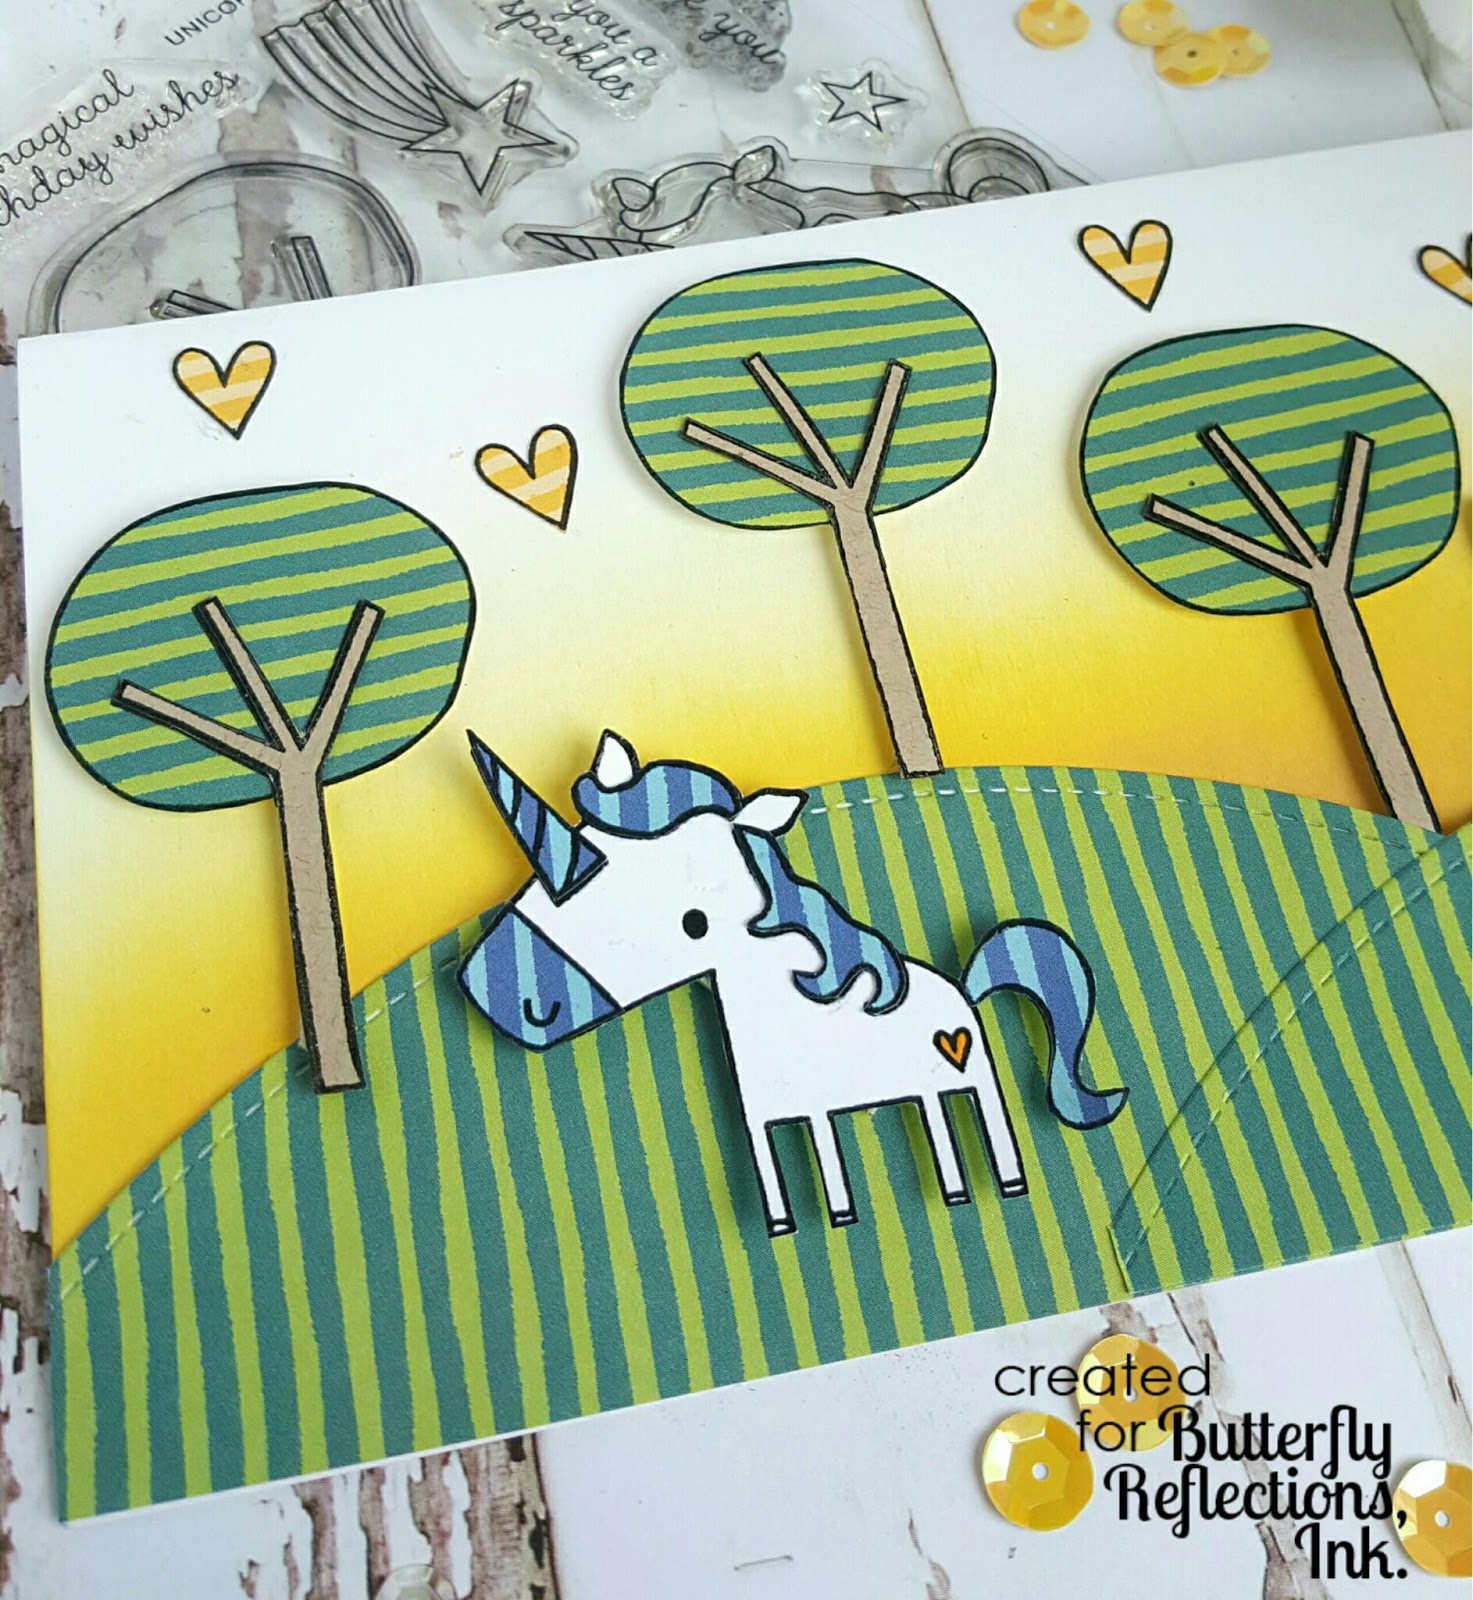
Hello Friends!!! Waleska here with another card for the Butterfly Reflections Ink blog to share a very fun and graphic card with lots of pattern paper and paper piecing, inspired on the illustrator of this Reverse Confetti images Dawn Machell.


CARD DETAILS:

For this card my main inspiration was Dawn Machell illustrations, she uses lots of different patterns on her images, she combines bright colors and graphic patterns to create AWESOME illustrations.  I started by choosing the pattern paper I wanted to use, there are lots of  Pattern Papers for you to choose at the shop.  I find one that would look well combined together on my card.  I used the new Reverse Confetti Magical Day Stamp Set and the Unicorn Wishes Stamp Set.  I loove long cards, because they give me the chance to use more stamps and do bigger scene cards, this one measures 4.5 by 8 inches long.  I stamp the tree, unicorn and dragon on the pattern paper with Versafine Onyx Black Ink so the black outline of the images could be more black.


I combined different colors of the pattern paper for the images and hand cut some of the details so that all the images can be color balanced, like the hair, tail and unicorn horn from this cute unicorn.  I glue the details with Mono Multi Liquid Glue.  This little details make the images look different and so cool.  I die cut two hills with the lawn fawn simple stitched hillside border dies to create a magical forest.  To color the background I used Oxide Ink Fossilized Amber.


To finish it up I used some hearts to embellish the up part of my card and stamped the GREAT sentiment from the Unicorn Wishes Stamp Set.  I hope you like this card and give paper piecing a try!
Remember the good news!!! Butterfly Reflections Ink shop is now carrying Stamp Market Stamps and there is still time to shop some Hero Arts goodies with 25% off with the code HERO25 until Friday!! 

Have a Magical Day!


Friday, August 4, 2017

Holy Guacamole New Mom/Krumspring Stamps

Hello Friends Waleska here with a set of very funny, encouraging and cute cards, because ALL moms need to feel loved sometimes. (ALWAYS).  I love to check out new stamp companies, I have some of my friends on the  Krumspring Stamps  design team and I have been wanting this set for so long they are awesome and unique.  The Butterfly Reflections ink shop is now carrying them so I was so happy to add this cute stamps to my stash!


CARD DETAILS: I started with the backgrounds, I made a heart shape mask with a Heart Die and Stick It Adhesive Sheets.  I used Lawn Fawn inks in colors Merman and Ballet Slippers for the inside part of the heart I blend the two colors with an Ink Blending Tool.


I arrange and stamped the Avocado Family to the front part of the cards because I wanted the little hands to be stamped in different layers.  I wanted to give this cards some texture and I used Embossing Folders to create that.


I stamped with Versafine Onyx Black Ink all the images and colored them with markers.


I hand cut all the cute avocados and place them on the card with Foam Mounting Tape, I color the outside of the card with the same green marker I used for the images.


I finally use Nuvo Drops Apple Green Bubblegum Blush and Caribean Ocean as embellishments. I added the sentiments with the Die-namics Stitched Sentiment Strips
I hope you have a wonderful day and can be inspired to make some Mom cards!


Saturday, July 29, 2017

Vellum + Oxide Inks = Marble Effect

Hello Friends today I want to share with you a very cool technique with Oxide Inks and Vellum to create the look of Marble, it looks awesome!


CARD DETAILS: 

I started with two Vellum pieces (you will need a thick vellum for this technique), I first put a little of  Broken China in my Ranger Mat and I added a little bit of water (you want the ink to the thick), and smooshed the Vellum into the Oxide Ink (I did not add more water to the piece) I only added the oxide ink and dry it with a heat gun, I did the same thing with the Wilted Violet and Cracked Pistachio inks in the parts I thought it needed.  When I finally got the look I wanted... "this next step is important" I flip the vellum piece and used the back of it for my card.  It looks great just like marble.


I used one of the vellum pieces for my card base and one to stamp the flowers from the beautiful Alternew Adore You Stamp Set. I stamped most of the flowers in the set with VersaMark ink and added Gold Embossing Powder.  I hand cut them and ended with lots of flowers to work with.


I  assemble the cards with the beautiful flowers and added the Postage Stamp Elle-ments die in black cardstock to frame both cards.  For the sentiment I used  MFT Label Maker Sentiments Stamp Set with Versafine Onyx Black Ink.


I finally added Pretty Pink Posh Sparkling Clear Sequins Mix, this cards look so elegant that you can use them for many occasions. Here are some closer looks to the cards.  Oxide inks are very vibrant, but with this technique you can get a more soft look to them.


I hope you enjoyed my little technique and can give it a try, thank you so much for stopping by today have a wonderful day!!!

Waleska

Tuesday, July 25, 2017

Slider Cards

Hello Friends Waleska here with another Summer Card for you, I love the Flamingo Floatie Stamp Set from Neat and Tangled, in the minute I saw this cute girl I knew I needed to use it on a Pool Party Summer Card.   


CARD DETAILS:

I wanted to create a pool background for the girl to be floating, so I found this technique in youtube let me share it with you because in my opinion it makes a very cool water look.


I started with a background fully colored with Distress Oxide Ink Peacock Feathers (which is my new favorite) after that I used a crumpled ball of Aluminium Foil I sprayed with water and pat down the paper with it to add the water texture to the background, and dry it with a Heat Tool.


I did the second background with two of my favorite Oxide Ink summer colors Fossilized Amber and Worn Lipstick (this two blend so well together) I created the slider elements with the lawn fawn slide over dies and double Scotch Foam Mounting TapeI color the cute girl with markers and added the water splashes in the same color as the water.


This cards were so much fun to create, I hope you give the water effect idea a try!

Thursday, May 11, 2017

Nautical Cards

Hello Friends!! I have been very Nautical this days with the
new Sunny Studio Stamps release with lots of Pirates,
Mermaids and Sea animals! Today I wanted to share a set
of 3 cards I made inspired on a card I made for my sweet 
daughter Leah and of course I needed to make one for my
boy Ian too.... if not I get in trouble!!!


All this cards are 7.5 x 4.25 inches.
For the first card I used the Pirate Pals stamp set with the word
AHOY that I cut with my Silhouette Cameo, my idea was to 
create a little scene inside the "O", for the background I did 
some dark blue stripes... I added the sentiment
 "You Are a Treasure". (This was for my boy)


For my next card I used the Magical Mermaids and I wanted to 
create the feel of  the mermaids peeking on the Ship windows... 
for more details on this card you can visit the 
where I show how to create the woodgrain background.


For my last card I wanted to create a night scene with the 
Pirate Pals on the beach, I created the background with
Oxide inks in colors Faded Jeans and Broken China.

This set was so much fun to make!
I have to admit that I love this new Sunny Studio release!
Hugs,

Waleska