Showing posts with label Slimline card. Show all posts

Wednesday, March 16, 2022

Rainbow Macaroons

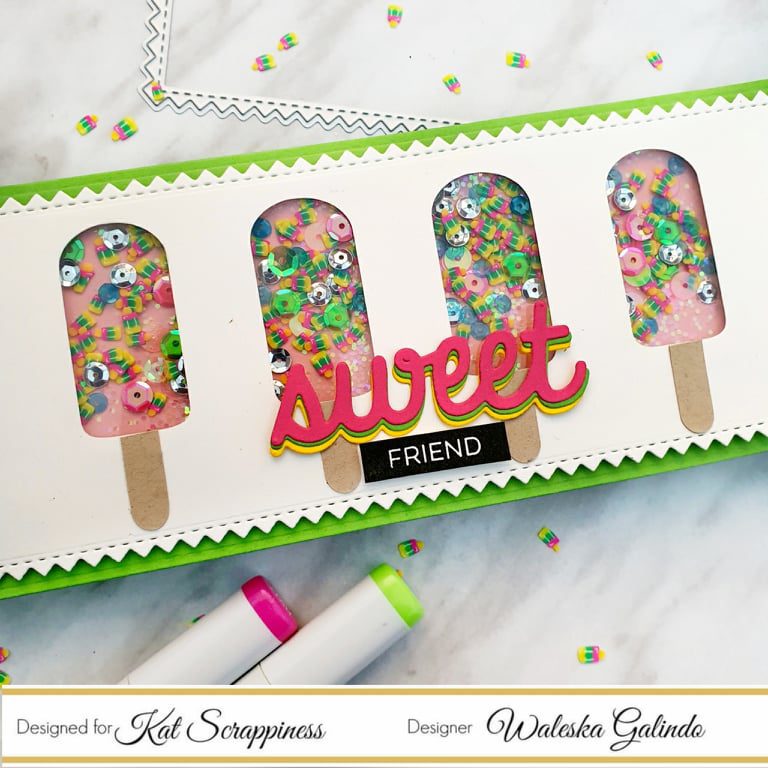
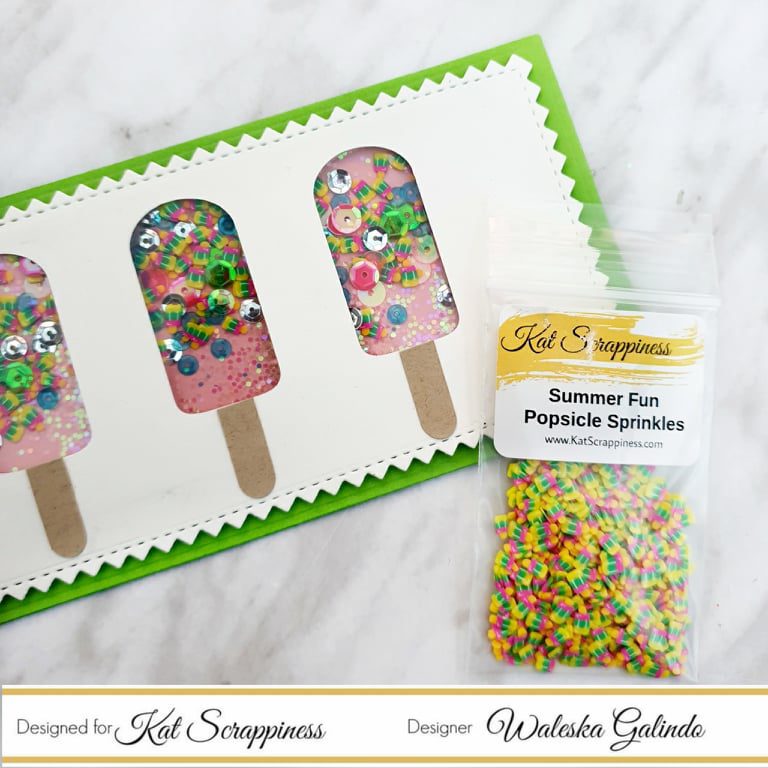
Hello Friends, Waleska here with a super fun rainbow slimline card, with the new and so yummy dessert, cookie,macaroon and donut metal craft dies this unique and  fun dies make the most beautiful food cards.  I hope you like them as much as I do.


CARD DETAILS:

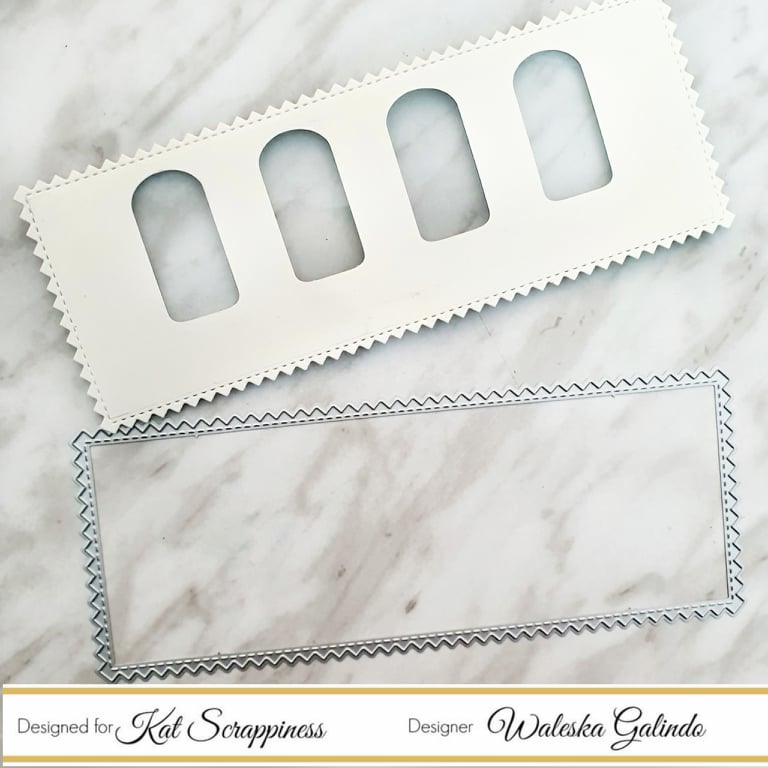
I started by cutting all the pieces you need to create the macaroons with white cardstock, for this  pieces I like to use thick cardstock.  I used markers to color this macaroons with all the tones of the rainbow I also used a white gelly roll marker to make some details on each of the macaroons.  I adhere all the pieces and did some shading with a light grey marker in the middle too. 


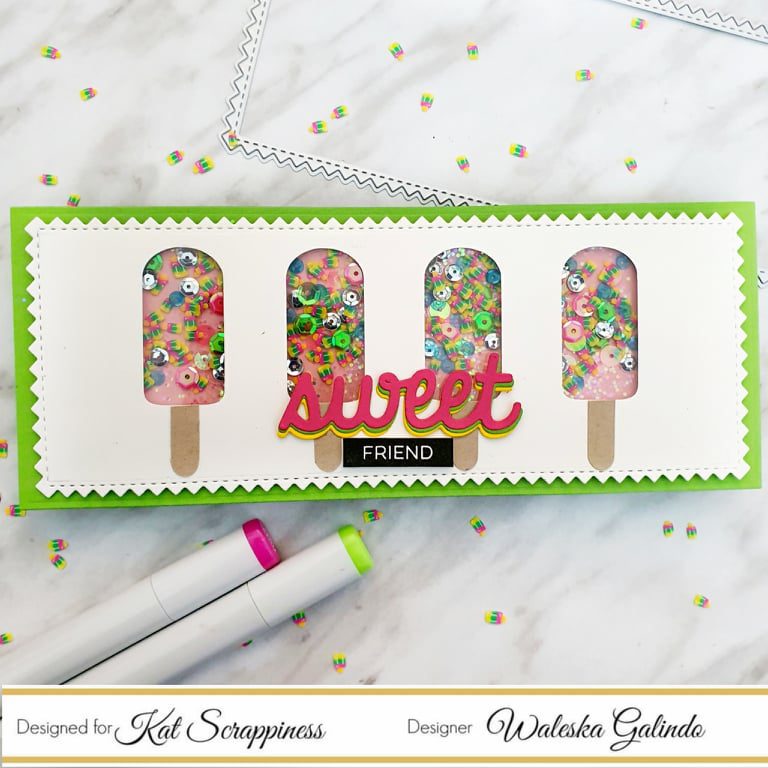
After that I did the background with oxide inks in colors Kitsch Flamingo, Candied Apple, Carved Pumpkin, Mustard Seed, Mowed Lawn, Salty Ocean, Wilted Violet I splash some water and adhere all the macaroons and added the sentiment at the bottom.

I hope you have an amazing day! Thank you so much for stopping by today and remember that this and other amazing products you can find at the shop!


Waleska Galindo


Wednesday, September 23, 2020

Sweet Slimline Shaker/Kat Scrappiness

   Hello Friends happy to share with you a yummy summer card!!! I know summer is almost over, but lately I have been making some last summer cards, I hope you like it plus I am sharing some of the new Kat Scrappiness sprinkles .


I started by cutting my card base with the largest of the new Zig Zag Nesting Slimline Dies and with an electronic cutting machine I cut the silhouette of some popsicles to match with my shaker sprinkles.


I then created the shaker by adding some 3D foam on the back of the front panel and adding the Popsicle Sprinkles mixed with some sequence and some glitter.  I adhere this panel to a green cardbase to match the color of my sprinkles.

I added the Sweet sentiment in three colors, again to match the sprinkles colors and added a friend sentiment too.

I hope you like my sweet slimline shaker card and can be inspired.

Stay safe, Stay crafty,


Waleska

Wednesday, September 9, 2020

Trinity Stamps Slimline Layered Balloons Stencil 4 Ways

Hello Friends I wanted to share the cards I created for the Trinity Stamps T.I.P Time... If you haven't check out this feature, I invite you to join me for quick and easy tutorials on the Trinity Stamps Instagram Stories on Wednesdays and on my stories on Friday!  Once in a while I will be sharing some of the tutorials here, but if you want to catch the entire collection of tutorials just head on the my IG Stories!!


This Slimline Layered Balloons stencil comes with two stencils that are very easy to line up to add detail to large slimline cards or any other size of card too.


For my first  card I used Oxide Inks: Cracked Pistachio, Mustard Seed and Dried Marigold.


I used Stickles Glitter Gel Moon Dust on the first layered stencil and added the bold sentiment on the right corner from Trinity Stamps too.


For my next card I used Oxide Inks on Kraft Cardstock in many different colors, I love how Oxide Inks colors pop on Kraft Cardstock I also added a bold sentiment.


For my last card I wanted to create some transparent balloons to do that I used White Pigment Ink I first created the background with Oxide Inks in colors Worn Lipstick, Dusty Concord and Shaded Lilac, it won't look all that nice right now but when you add the balloons, it will look great!!


I love all this Slimline cards, this cards can be easily made with this fun Trinity Stamps Stencil, they have some other amazing stencils too check them out HERE.

Thank you so much for stopping by today, remember to stay safe and stay crafty!!!


Waleska


Thursday, August 27, 2020

Divinity Designs Guest Design Cute Monkeys Slimline


Hello Friends today I have this fun Slimline with this adorable monkes from Divinity Designs, and also a bunch other great products also from them.

For my card today I used the Divinity Designs Slimline Card base dies on kraft cardstock.  For my card base I used the Slimline Layering Rectangles.  I used Oxide inks in colors Dried Marigold Mustard Seed and Squeezed Lemonade and I also add some water splashes.


I then planned out my jungle scene with the Divinity Designs Fern Dies and Tropical leaves those I inked with Mowed Lawn and Lucky Clover Oxide Inks, I love the texture of the leaves!


I adhered the leaves in place once I was happy with the placement and cut the excess from the borders.  I copic colored my cute monkeys and stack them to fill the slimline card.  I stamped the sentiment at the top of the card and added a kraft Scalloped rectangle die to finish this fun card!


I am super happy to be Guest Designing for this amazing company their dies are really amazing check them out HERE.

Thank you so much for stopping by today and sharing some craty time with me! Stay safe...


Waleska
 

Divinity Designs Products used:

Thanks a Bunch Stamp Set

Slimline Scalloped Rectangles

Slimline Layering Rectangles

Ferns Dies

Tropical Leaves Dies 

Friday, August 7, 2020

Slimline Room Builder Set + Classroom Cuties Stamp Set

Hello Friends thank you for being here today!! From now on every Friday I will be sharing a brief tutorial showcasing some Trinity Stamps Product for you to know more about.   You can also find a quick Instagram story about it HERE.  

This is just released die is the perfect addition to your slimline dies to create indoor scenes!!


CARD DETAILS:

With a total of 17 dies the Room Builder die contains many pieces to create the most amazing indoor scenes.  I had the idea of creating a classroom with this die so I cut some of the pieces and created some fun new elements.  With the window die I created a board, a door and a shelf for bags... 

After I created all the classroom elements I started assembling my room.


I started with the floor, I wanted to create a wood floor, to create the wood I used Distress Inks in colors Walnut Stain and Vintage Photo swiping it on the top and bottom of the floor.

I then cut the walls from different colors and adhere this three together and just like that the room starts looking great!

I die cut and stamp the rest of the elements I also used the Classroom Cuties stamp for the cute classmates, the bags and lunch boxes on the bookshelf.  The banner is a from the lawn fawn box die.

I glue all the elements on the classroom and I just love how everything looks!  I tryied to stay on a consistent color palette which was red blue and yellow for a cohesive look.

I hope you like this idea to create a classroom card! I had so much fun creating this one and I love how everything looks together!  Give it a try... what else can you create with this die? 

Stay safe, Stay Sane, Stay Crafty!


Thursday, August 6, 2020

Baby Shark Do Do Do Do Do Do

Hello Friends I am super happy to be sharing with you again!   I had so much fun creating this colorful slimline card I hope you like it! Since the first time I saw this MFT die I was in love!


CARD DETAILS:

I started by die cutting this fun MFT Baby Shark Die-namics with different colors of cardstock.
You can do them in any color, I added a little shading to the sharks with Oxide Inks for dimention.


To adhere together the shark mouth I found that it is easier to assemble the teeth and the inside part of the mouth and then adhere the mouth part.


To continue with this card I did the card background, I wanted a deep sea feel, I used oxide inks in colors Wilted Violet, Blueprint Sketch and Mermaid Lagoon, for the sand piece I used Trinity Stamps 
Slimline Scenic Border Dies I used Vintage Photo Oxide ink for the edges and splashed some vintage photo drops of water as well as some white acrilic paint mixed with water for some tesxture of the sand.


I also cut  two panels of the Lawn Fawn Bayou Bakdrop on a light green cardstock and shadede it with Lucky Clover Oxide Ink.


Aftter I had all my diecus ready and shaded I started planning where to put all the elements on this card-.  I adhere the sand and sharks and cut some leaves from the bayou die to glue them behind the sharks... I finished this card by gluing some irridescent bubbles.  I love this die I can almost here them singing.... Baby Shark!!!


I hope you are safe, thank you so much for joining me today for this fun tutorial.

All the products used to create this card can be found on the Butterflyreflections Ink Shop!

Hugs