Saturday, December 4, 2021

Nutcracker Snowy Card/ Scrappy Tail Crafts

Hello Scrappy Tail Craft Fans, Waleska here for my first post for the month of December! This is my first time using the Nutcracker Spinner Add on and I have to say I looove it!  It is so fun to put together you can make them from different colors and make all kinds of cards with it!  I hope you like it and can be inspired with it!


CARD DETAILS:

To start this card I cut all the pieces that come on the Nutcracker Spinner Add on from different colors of cardstock.  I found a color combo I wanted to use so it was easy to use this color on all the elements of this fun die.  The color combo I used was pink, red, black and gold.


I then cut the two ovals that come on the Slimline Snow Globe Pop Up die from green and kraft cardstock, I also cut some leaves from the Assorted Christmas Leaves from two different green cardstock.  I adhered the nutcracker to the oval pieces and I also added the leaves.  I add Distress Grit Paste to the leaves for a snowy look.  


To fishish this card I glue everything to a cardbase piece I made with kraft, white and red cardstock.  I added some splatter snow with acrilic pain mixed with water and some gold pearls.  I love this card I hope you like it too it was so much fun to create.  I hope you have a wonderful rest of your day, thank you so much for stopping by!


Waleska

Saturday, November 27, 2021

Slimline Spinner Poinsettias/ Scrappy Tail Crafts

Hello Friends, Waleska here with a beautiful Slimline Spinner card, I love this recently released products they are so unique and you can make the most beautiful cards with them.  Today I share a new way to use the Whimsical Layering Daisies for this season I hope you like it.


CARD DETAILS:

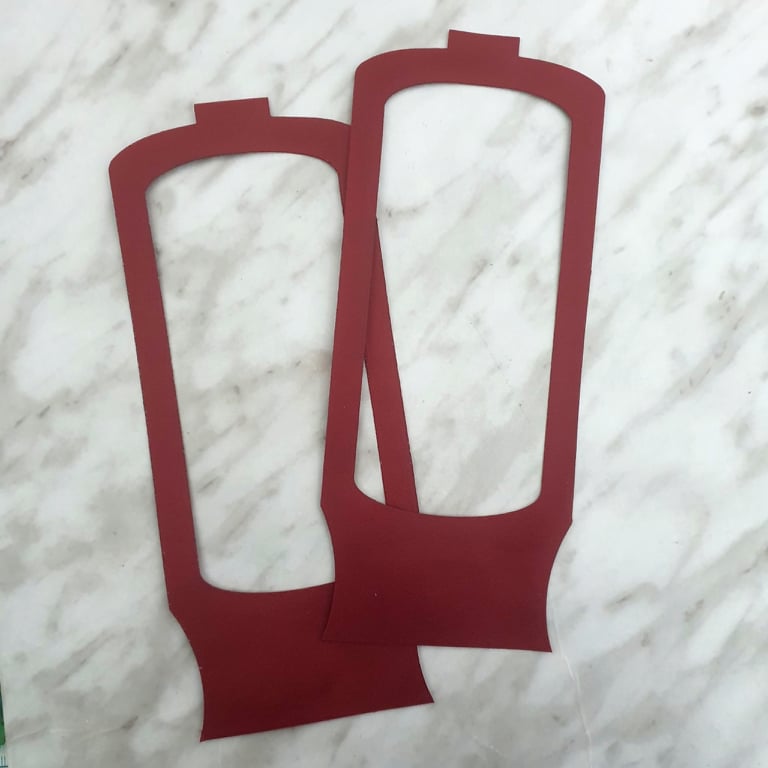
I started by cutting all the pieces you need to create the Slimline Snow Globe pop up card with a Burgundy cardstock I found in my stash, in my opinion this is a very elegant color and all my inspiration came from that color.


After assembling the Slimline Snow Globe card I started with my idea for the spinner element, I wanted to create an arrange of poinsettias and to do that I used the Whimsical Layering Daisies.  This are Daisies but when I cut them with the same burgundy color I used before, they totally look like poinsettias.  I also cut some other leaves and elements from green, white and kraft cardstock.


I then arrange the poinsettias in the spinner element on both sides, I added some white opaque ink to some parts of the flowers and on the kraft cardstock.  I adhere this two spinner elements together with the twine in the center to make them spin and with white acrilic paint mixed with water I added some splashes to make them look like snow.


I finally added the sentiment  with white embossing powder, and this card will be displayed at my home all the Season! 


I hope you have an amazing day! Thank you so much for stopping by today and remember that this and other amazing products you can find at the shop!


Waleska Galindo

Friday, November 12, 2021

Coffe Lovers Hop Kat Scrappiness

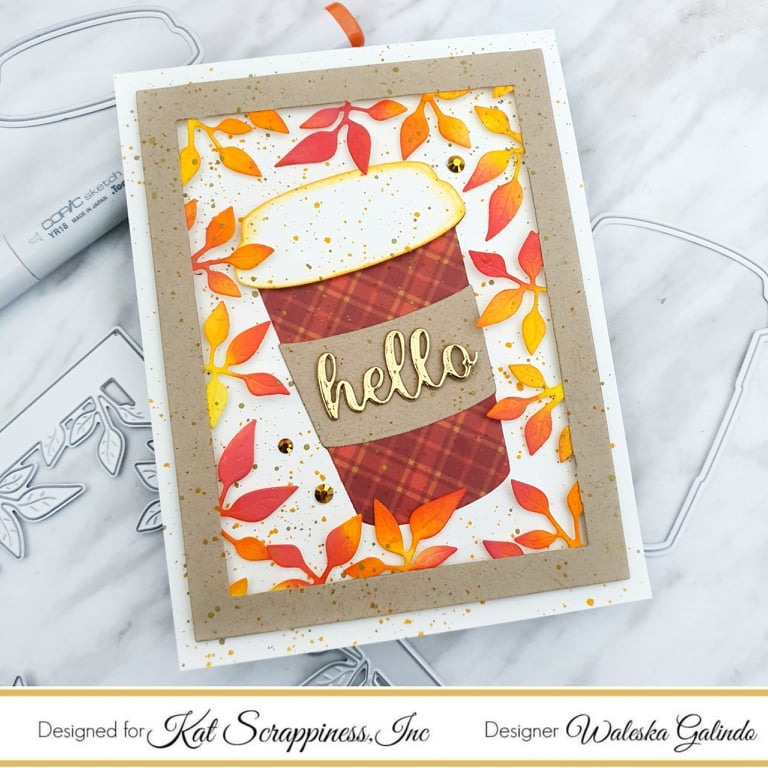
 Welcome for today's Coffee Lovers Hop.   Kat Scrappiness is pleased to be a returning super sponsor for the Coffee Lover’s Blog Hop for the Fall/Winter 2021. As a design team member I’m thrilled to show you a project I made using some of the Kat Scrappiness “Coffee” related products. We currently have over 100 Coffee themed products available here! Remember, *everything* in our “Coffee” Category is 15% off from NOV 12-19TH, And as an added bonus we will include EVERYTHING else on our site as well!!!! use coupon code: “FWCOFFEEHOP” for 15% off your order). We are also having a giveaway! Since Kat Scrappiness is a super sponsor, we will be giving away a $25.00 gift card to the store, PLUS a flash prize which is a surprise package of Kat Scrappiness products!. 

CARD DETAILS:
For my card today I used the awesome Layered Coffee Cup die.  I paper piece this fun die with pattern paper but you can colored it or ink it any way you want.  I then cut the Foliage Frame from white and kraft cardstock, I inked the leaves with oxide inks in colors Carved Pumpkin, Barn Door and Mustard Seed.  I cut only the frame of the same die with kraft cardstock and adhere it to the inked piece.  I then adhered the coffe cup to the center and used the same colors of oxide ink mixed with water to make some splashes.  I added the Hello die in gold to the center of the cup too.


Thank you so much for stopping by today remember to keep hopping here:
Don't forget to shop and use the coupon code: “FWCOFFEEHOP” have a wonderful rest of your day!

Waleska Galindo

Saturday, September 25, 2021

 Hello Friends Waleska Galindo, today I want to share with you my card to celebrate Autum, one of my favorite Seasons, I love the colors, the falling leaves, and the pumpking pie, but specially the beautiful red, orange and green tones.  I hope you feel inspired with my card today to create some fall cards.


CARD DETAILS:

To start my card I cut the Slimline Woodgrain Background Metal die from kraft cardstock, I inked this panel with vintage photo oxide ink.   To give this piece some texture I mixed vintage photo oxide ink with water and with a small brush I splater the wood like piece.  


I cut two of the leaves that come in the Assorted Leaves Metal dies many times on a white cardstock panel that I inked with vintage photo, carved pumpkin and peeled paint oxide inks, I also cut the shadow of one of the leaves from gold cardstock.  I cut an oval piece for my sentiment and started assembling my fall card.  I added some gold accents and adhere some leaves on the top and bottom of the front panel.


I cut a slimline card base from kraft cardstock and adhere the wood panel.  I love the texture of the Slimline Woodgrain!  I hope you have a worderful day! Remember this and many of the other amazing products are available at the shop.


Waleska


Saturday, September 11, 2021

Rainbow Flowers Scrappy Tail Crafts

 Hello Friends Waleska Galindo here! I hope your day is going great!  Today I wanted to share a slimline card I created with the Whimsical Layering Daisies Die... can I just say I am obssesed with this die!!! it makes the most fun and whimsical flowers!  This time I made some rainbow colored flowers, I hope you like my card and can be inspired by it!

CARD DETAILS:  I started by diecutting six flowers from one of the many different flowers that come on this set with white cardstock.  I then used some small brushes to put color on each of the flowers starting from the center, I always try to leave some white parts to make them look more interesting.  I then cut the center of the flowers and colored them with  Y00 copic marker I added Chunky Glitter on each of the centers too.

I then cut the stems with white cardstock and with a green marker I colored them.  I cut a black panel of cardstock and started adhering all the flowers going in rainbow order.  I then adhere this piece to a cardbase and added the sentiment!  Super fun and easy card to make!


I love this cute set! I hope you like my card today and can be inspired to create some rainbow flowers! Remember this and many other amazing products you can find on the Scrappy Tail shop!  Have a great weekend!


Waleska


Saturday, August 28, 2021

Elegant Gold and White Advent Calendar

Hello Scrappy Tail Friends, Waleska Galindo here to share my Second Design Team post of the Month, I have been very busy with the new School year preparation but here I am super happy to play with some of my favorite Scrappy Tail products.  For today's post I used the Slimline Birdhouse Pop Up die and I also used the Advent Calendar Add-on to make a very easy buy elegant advent calendar.  I hope you like it.


CARD DETAILS:

To create this card I started by die cutting all my pieces from white and gold cardstock, for the house I always try to use a heavyweight cardstock to make sure my house will last longer.  I then started assemble my Advent Calendar.  We have many different videos on the Scrappy Tail Crafts youtube channel if you want more details, but it is super easy to assemble.


I love the elegant look of the white and gold together.  To adhere the numbers I suggest you use glossy accents since they are very delicate.  I adhere a gold backing to the house so when you open the little doors you will find  the gold and some beautiful snowflakes, but you can put anything you want inside, this die comes with many cute christmas icons to decorate it and we also have a stamp set if you prefer.


I love all the gold details! as I told you before you can personalize this advent calendar with the colors you want! I am planning to have lots of gold and white on my christmas decorations this year so that is why I choose this colors today!

I hope you have an amazing weekend! Remember this and the latest released products are available on the shop now.


Waleska

Saturday, August 14, 2021

Spread your Wings with Scrappy Tail Crafts

Hello Scrappy Tail Fans, Waleska Galindo here to share my Design Team post of the Month, I had some amazing vacation visiting my brother and now I am ready to share with you some new inspiration with the awesome Scrappy Tail products.  For today's post I used the beautiful Fairy Girl stamp to make a card with a 3D effect.  I hope you like it.


CARD DETAILS:

To create this card I started by coloring the image it was very easy, I tried to make it very simple because I wanted the wings to be the center of this card.  I used copic markers to color the hair, skin and flowers.  I then used a purple vellum I had to stamp and gold embossed the wings from this stamp set and hand cut them two times each wing.  I then adhere this wings to the image only to the center so they would look 3D. 


I love the fun effect! I then used Nuvo Shimmer Powder for the first panel of this card.  I wanted a magical look and this powders did the job very well.  I then adhere this panel to a gold cardstock and a white cardbase and added the sentiment.  


This was a super fun card to make as always this magical image is excellent for girls I am planning to give it to my daughter.

I hope you have an amazing weekend! Remember this and the latest releases new products are available on the shop now.


Waleska